
SOLIDWORKS User Group meetings are always a good source of information. (To find more out information & your closest User Group go to SWUGN) I never fail to come away without learning something new. As was the case the other night. A simple question was raised! “How do I take a SOLIDWORKS Toolbox part and break the references to it being a Toolbox part?” I’m a simple user of Toolbox. I mainly use just for inserting fasteners, self clinching nuts, bolts and the like, so I had no answer! But there is always someone at the meeting (or a collective group) who does know the answer and it goes like this!
If you drag and drop the Toolbox part into a Assembly, it shows with a “Toolbox” Icon in the FeatureManager Design Tree. The Toolbox part can be opened and “Save As” (to your own file location). Even with “Save As” it still has references as a Toolbox part
 SOLIDWORKS does provides an application to allow the part to be toggled between being a Toolbox part and just a SOLIDWORKS part. The utility is slightly hidden but can be found in – C:\Program Files\SOLIDWORKS Corp\SOLIDWORKS\Toolbox\data utilities. The application is – sldsetdocprop.exe
 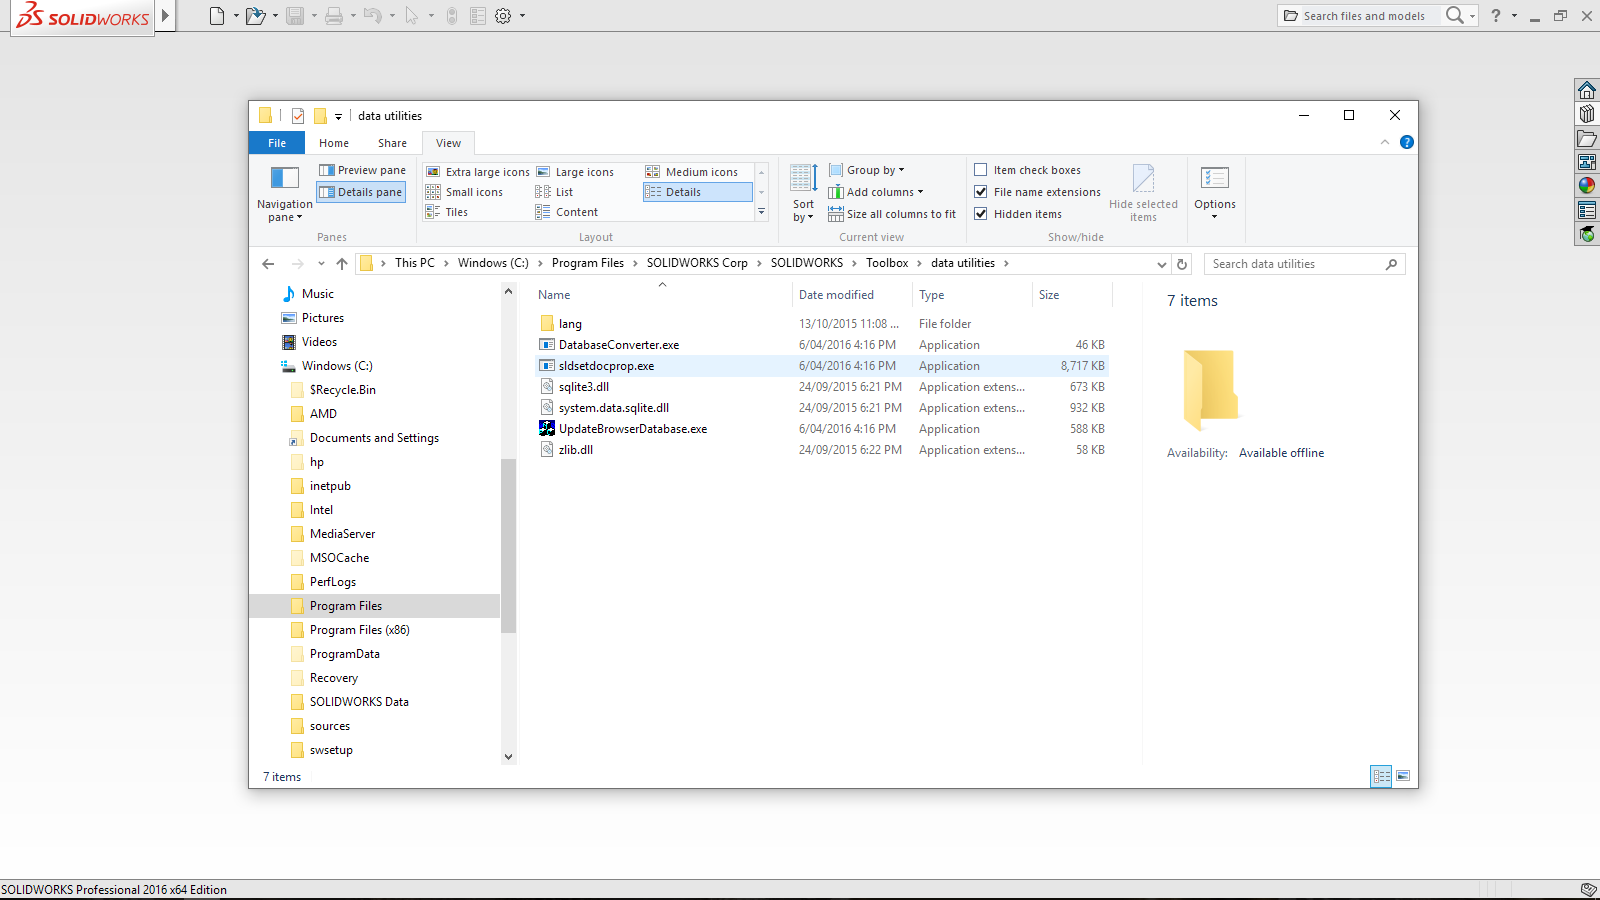 Run the application (double click on sldsetdocprop.exe ) and the Set Document Property dialogue box opens. If you Select Set Property:Yes then Add File (navigate to where the part was Saved). Then Select Show Selected Property. It will display the part property as a Toolbox part – (IsToolboxPart = Standard)
 Change the Selection to Select Set Property:No, then select Update Status. Then Select Show Selected Property. It will now display the part property as a part – (IsToolboxPart = No)
 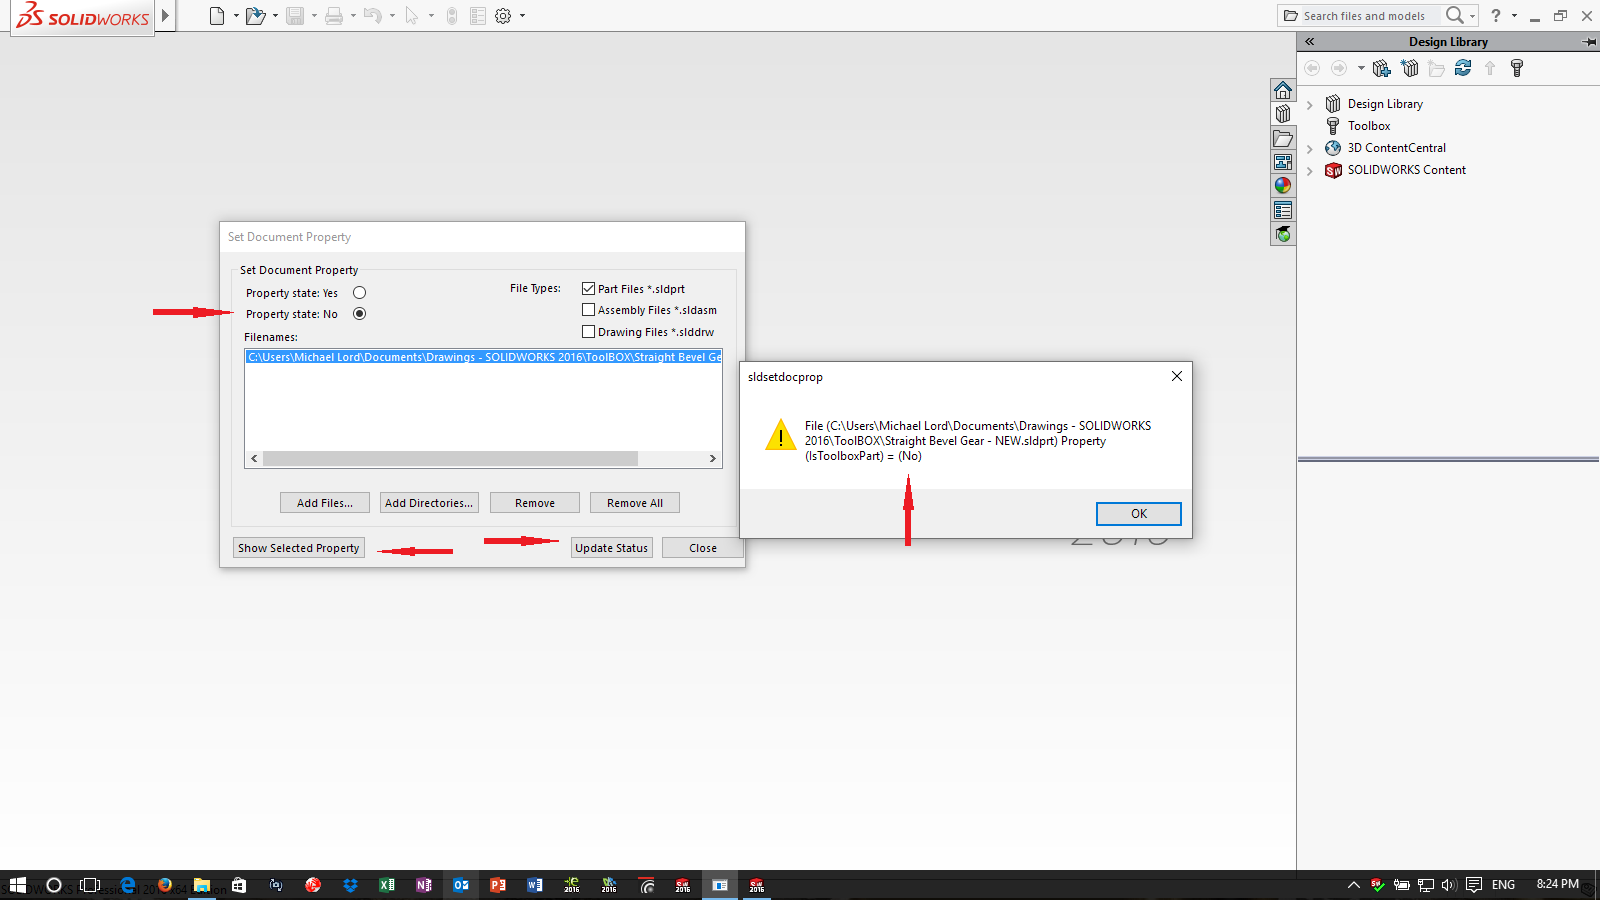 To check that is is now just a Part. Insert the part into an Assembly. It now will show as a part (& display a Part Icon).
 As simple as that!

Leave a comment