
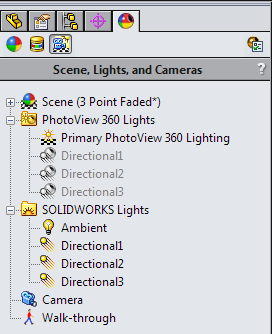
 One area of SOLIDWORKS 2015 that has received very little enhancements has been PhotoView 360. There are some improvement that provide more clarity on how “Lights” are controlled and toggled within SOLIDWORKS and PhotoView 360. But there is however one very interesting new feature – Render Region.
At first glance it is, as it’s name suggests, just a feature that allows a “Region” of a model to be selected and rendered. Although it does just that it also has a couple of really interesting additions to this features.
I prepared the model to render in the usual way by adding materials, setting scenes and camera. Review the render with the “Preview Window”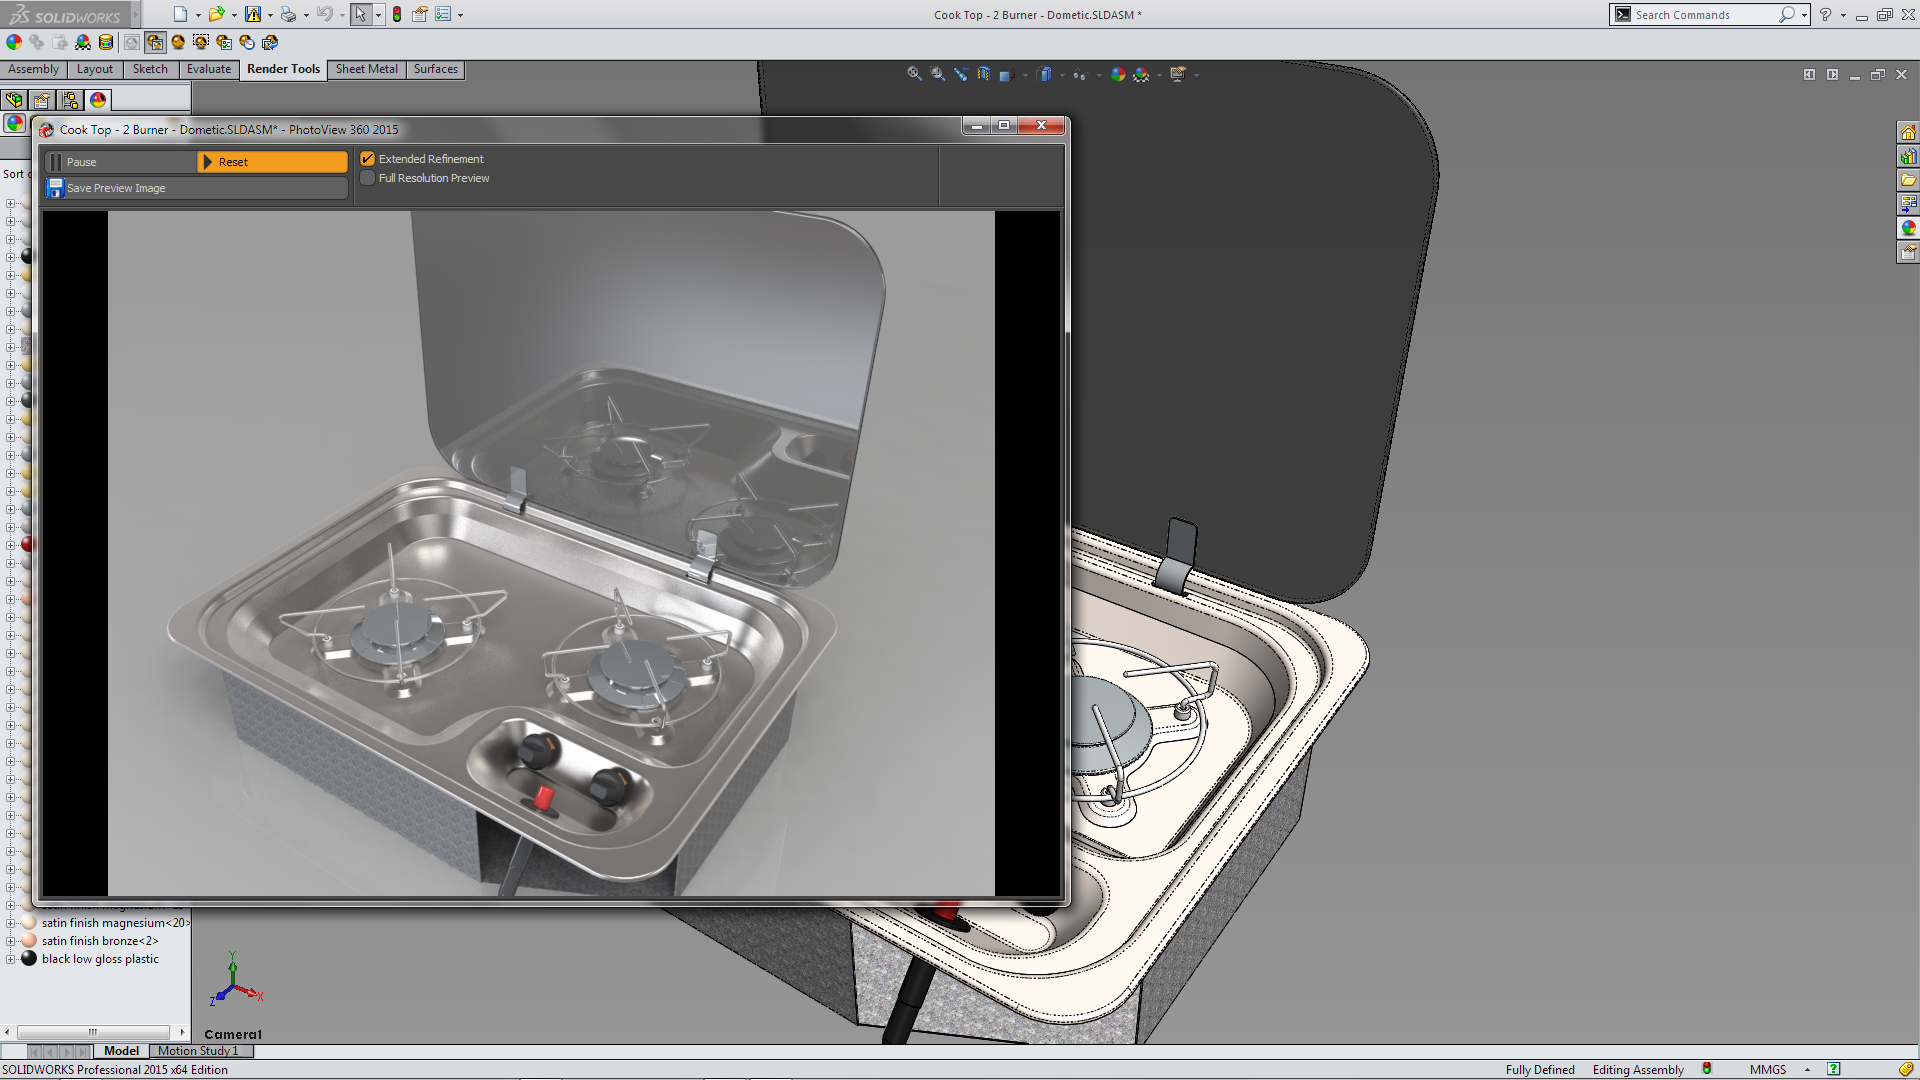 The Render Region feature is selected either via the PhotoView 360 Tab or the Render Toolbar.
 One of the most interesting parts of the Render Region tool is it’s ability to allow you to “preview” different materials within the existing “Preview Window”. To do so select a “region”of the model and adjust the location and size to suit. An alternate material can now be dragged and dropped on to the required part. Although the material is applied to the selected feature in the model (in the graphics area) it is only shown in the Preview Render Window in the selected region. It’s a nice feature that allows the direct comparison of now different materials will look on the part.
 It also can be used to highlight a component or a change and create slightly different renders. If I wanted to highlight the change in materials to the cooker knobs. I could applied the material to the knob (as per the technique above). Then by zooming in, the model in the graphic area zooms, but only the selected region in the Preview Render Window enlarges.
 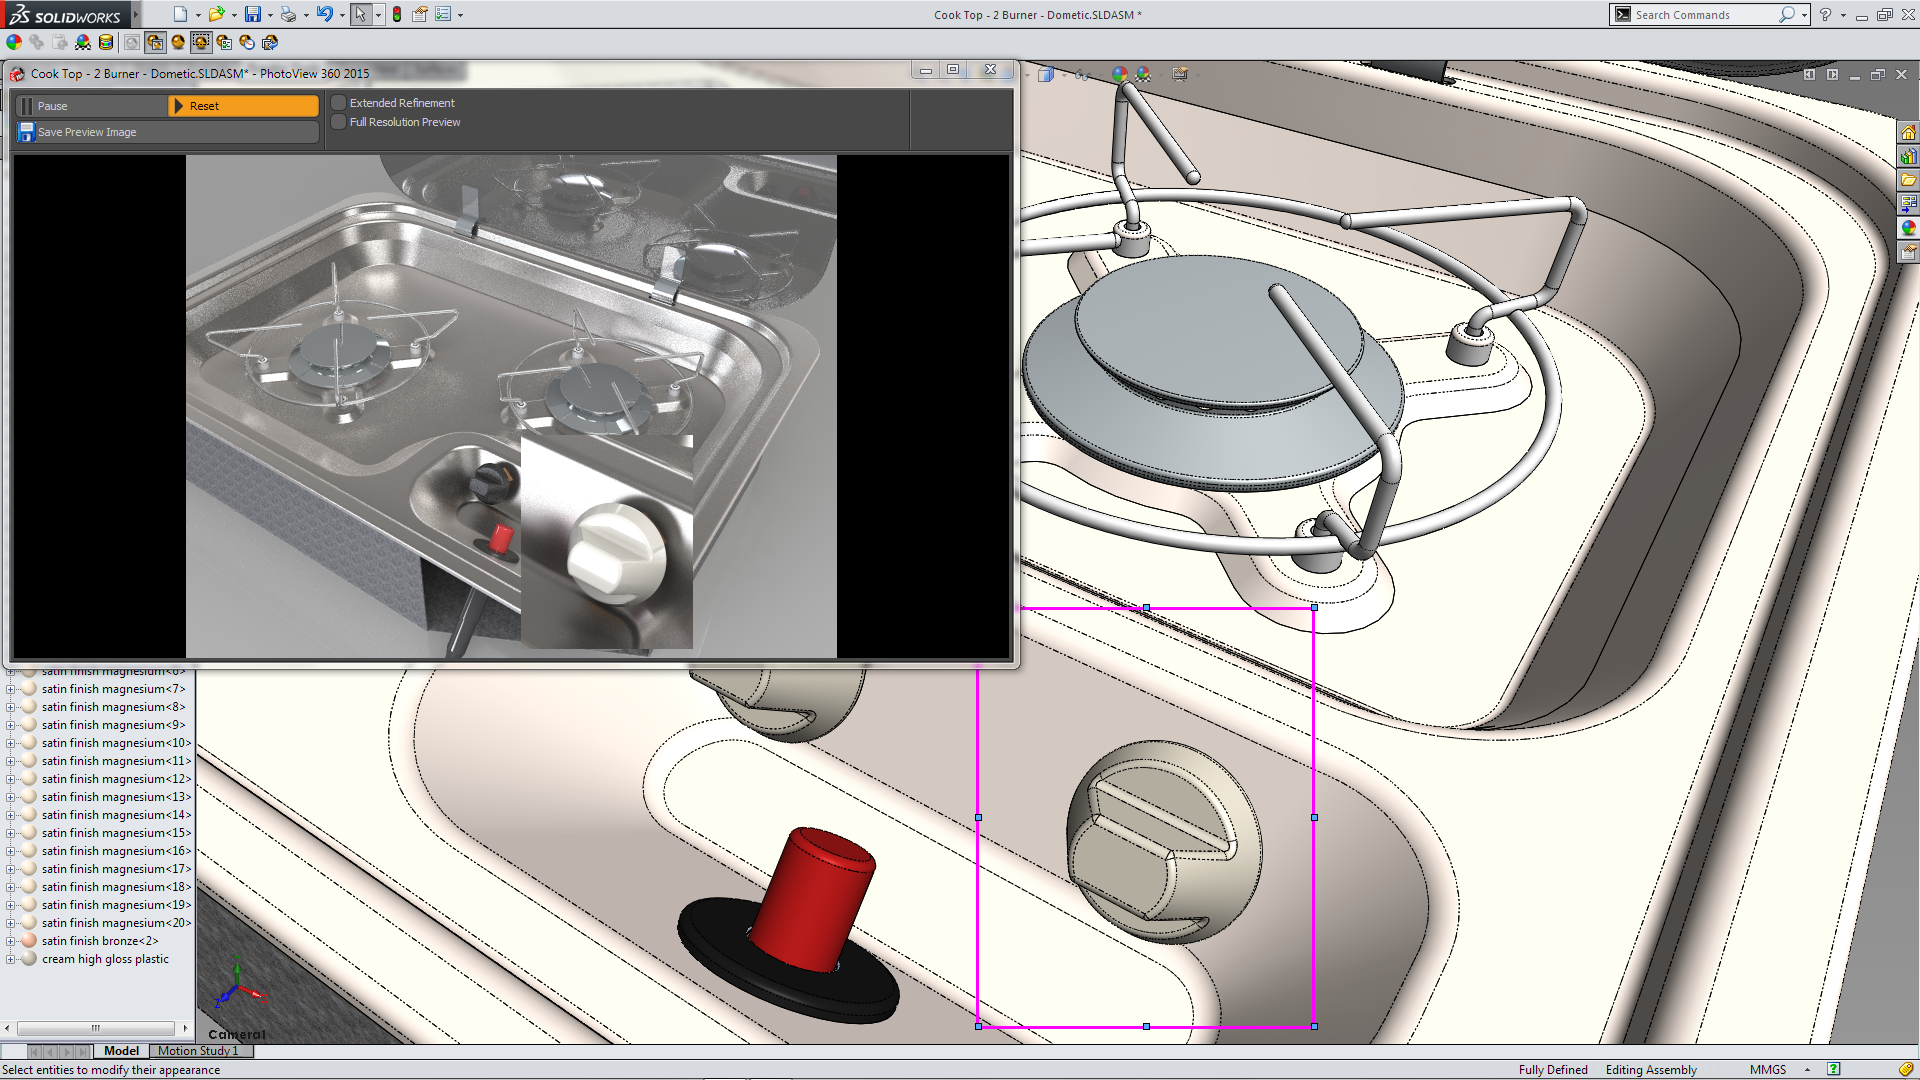 One of my favorite and often used feature within PhotoView 360 is “Save Preview” introduced in SOLIDWORKS 2014 that allows the Preview render to be Saved. I regularly use the “Save Preview” if I need to produce a number of comparison renders (especially if just emailing for internal discussion). By using that feature with the Render Region (and by zooming in) it allows the creation of some different and unique renders which can be used to highlight a change.
 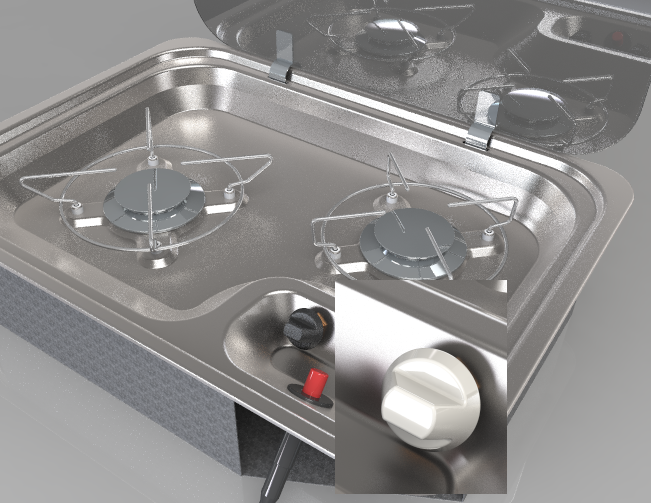 If you do want a create a “Final Render” with the selected region there is the advantage of saved time. Rendering the above selected region took only 2:10 minutes
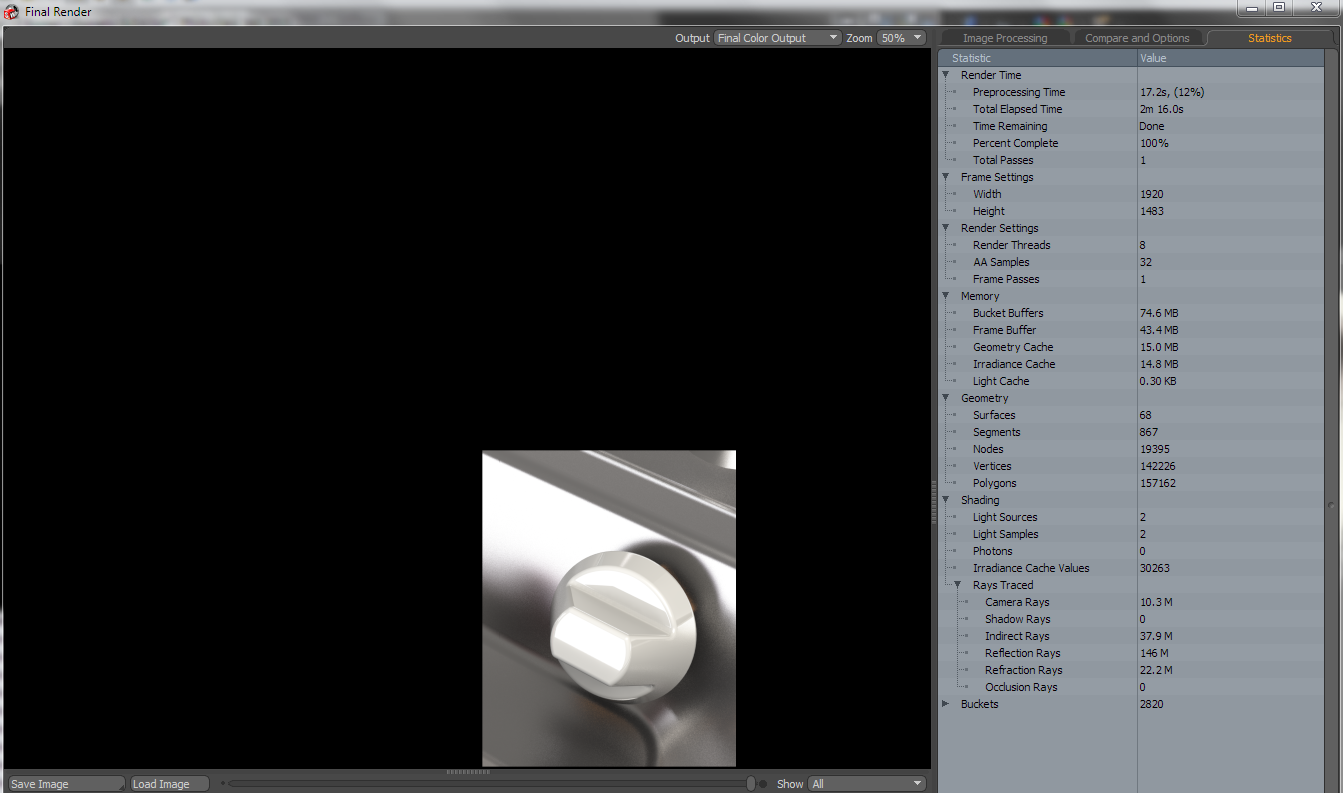 Compared to 8:34 minutes to render the whole model.
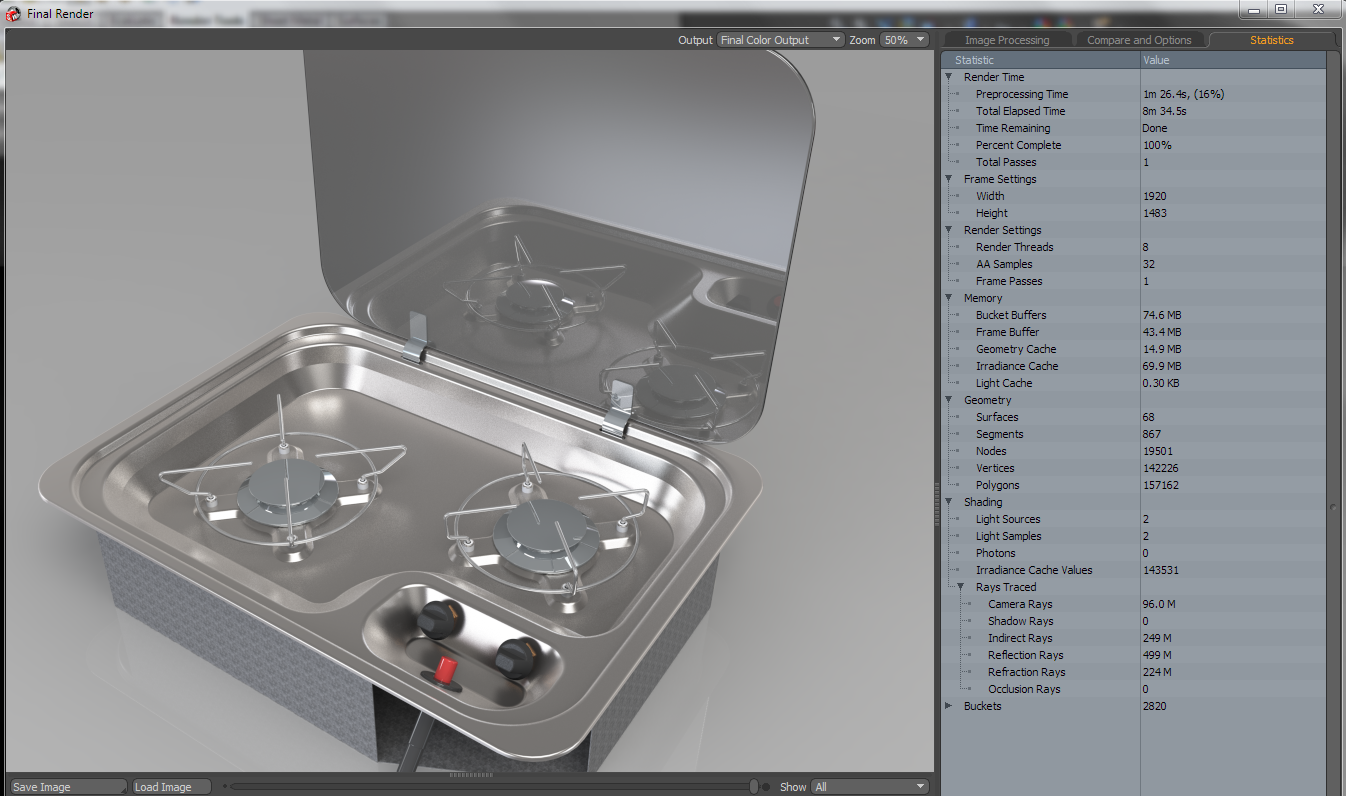 All of the above features were used by first selecting the Preview Window and then the Render Region. An interesting render can be created by using Real View with in the model. Using Render Region and selecting the required area and then select Integrated Preview. By then taking a screenshot (or using the Snipping tool) it captures another way to creates a different highlighted render.
 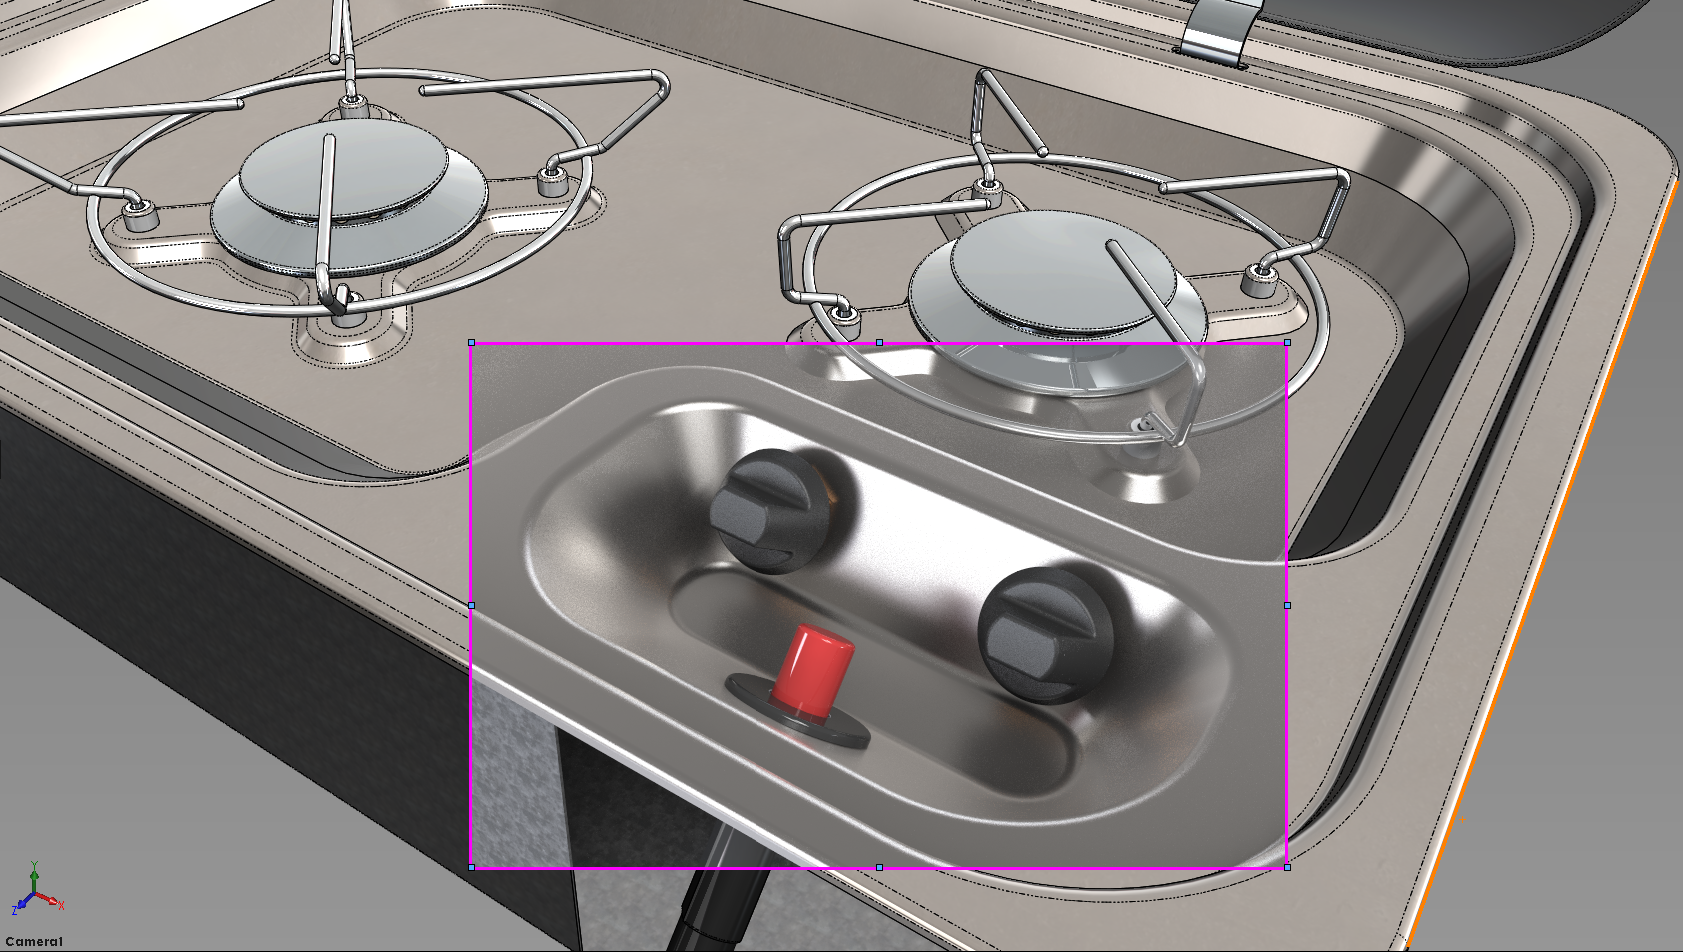 Although the Render Region might be the only major enhancement to PhotoView 360 in SOLIDWORKS 2015 it certainly is a very good one. It a tool that allows not only time saving but the ability to compare the look of different materials. Further it can be use to create some different and interesting renders and that can never be a bad thing!

Leave a comment