
SOLIDWORKS 2015 is here. More correctly SOLIDWORKS 2015 is out of Beta and Pre-Release 1 is now available.
For the past fifteen (15) days DS SOLIDWORKS have been releasing a new feature a day teaser videos on the SOLIDWORKS Blog site. Now the new SOLIDWORKS 2015 website has launched with information and videos of the “Top Enhancements” in this release.
 Over the part few weeks I’ve had the chance to start working my way through the “What’s New SOLIDWORKS 2015” document. My first impression has been that there has been a conscious effort to bring more similarity to many of the existing features. These improvement look to expand many of the existing features as well as bring more continuity and a familiar workflow across the program.
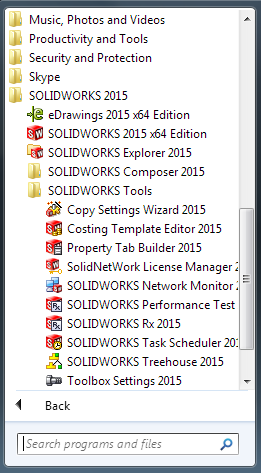
It starts from the moment you go to open the programs. Earlier this year SOLIDWORKS adopted the captialisation of Dassault Systemes branding of their products. We now see this across the board with SOLIDWORKS 2015 release including all the folders (in the system tree) and the program names.
With my first read of the “What’s New” I like to look for the day to day use features. I’ve always found that they are the ones which have the most significant impact on how I use the software. It also is where the most time savings, less mouse movement and reduced mouse clicks saving are to be found.
So with that I opened SOLIDWORKS 2015 and went to see what I could find.
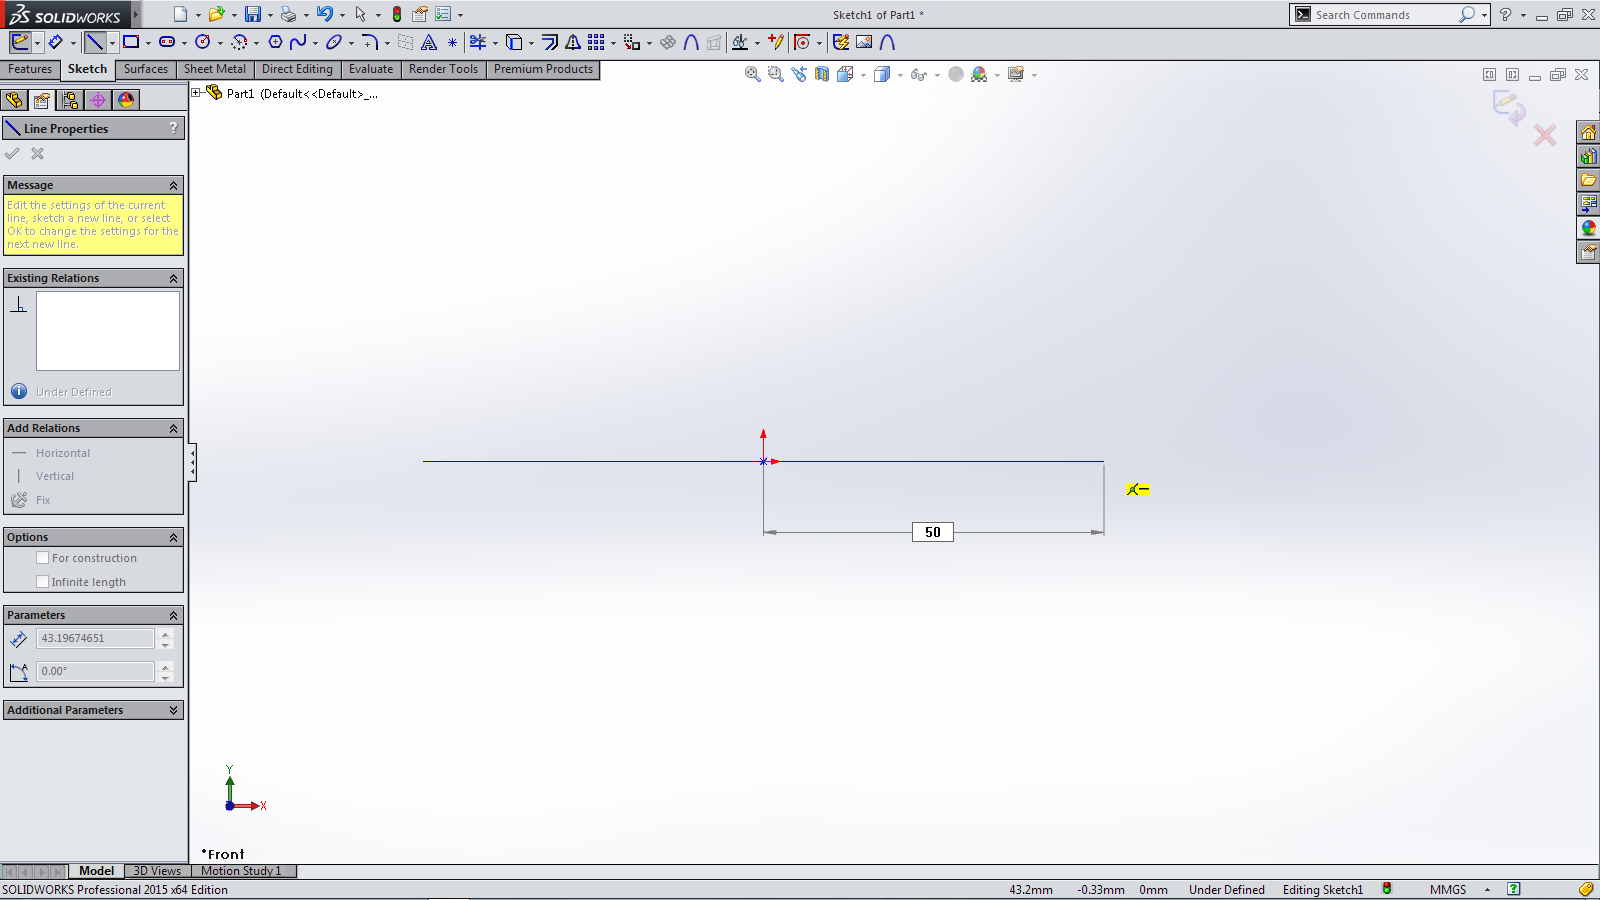
Let’s start with a few of new Sketch features. With SOLIDWORKS 2015 there is now Midpoint Line. You can now create a line that is symmetrical from the midpoint of the line. I figure that 95% of my first Line sketches I start with would have to have a Midpoint reference. This is a feature that expands on from the Centre Rectangle feature introduce a few years ago. As with any line, Start a new Sketch>Line> Midpoint Line
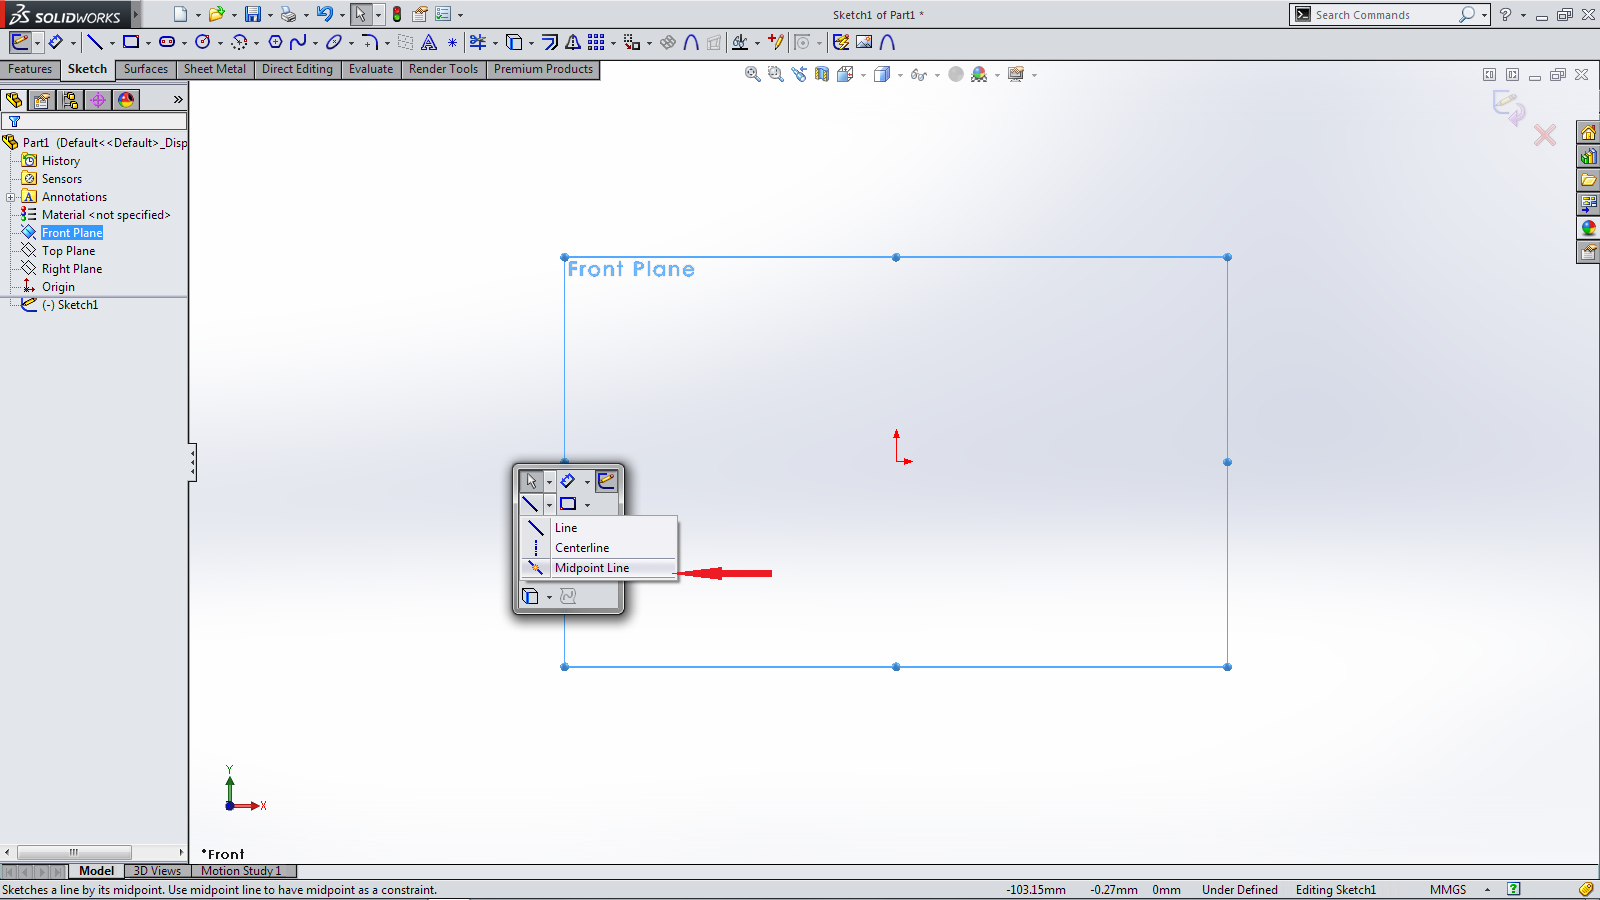 The Midpoint line will “snap” from the “Midpoint”of the line to a reference point, Origin, corner point etc
 I’ll make an early call on this and say that Midpoint Line will be the single most adopted feature from this release!
With a mention of the Centre Rectangle it has now expanded with Centreline to Rectangle. It seems a natural progression. Now when you select Sketch>Rectangle>Rectangle Type you have the Option of Add Construction line. 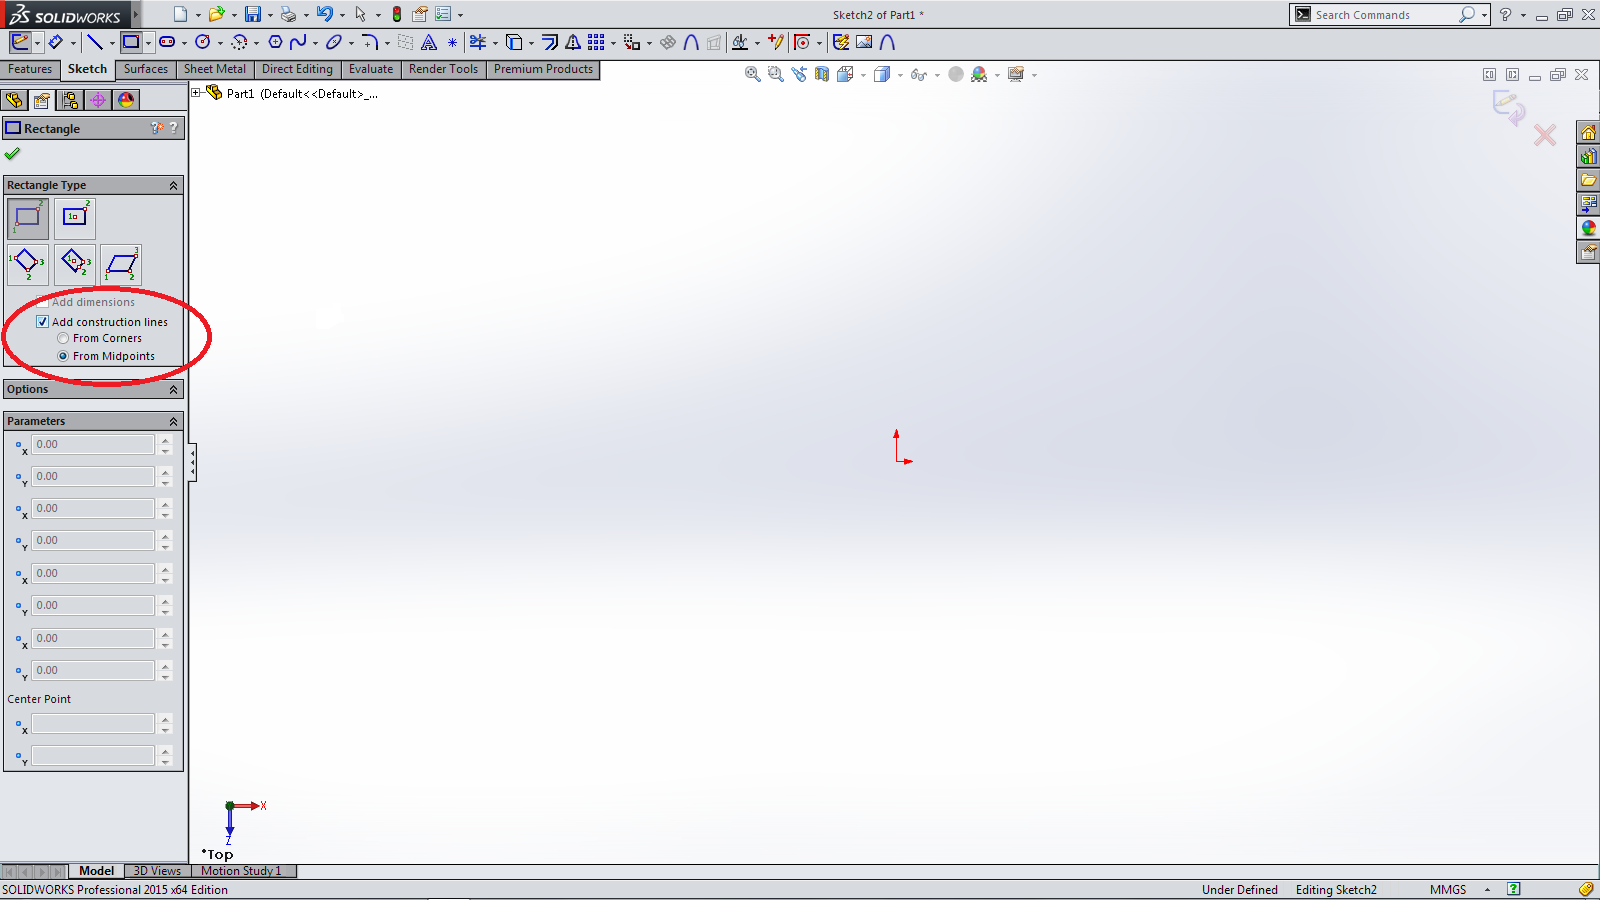 With Centre Rectangle the centrelines were once only from the corners There is now the option of adding the centrelines from either Corners or Midpoints
 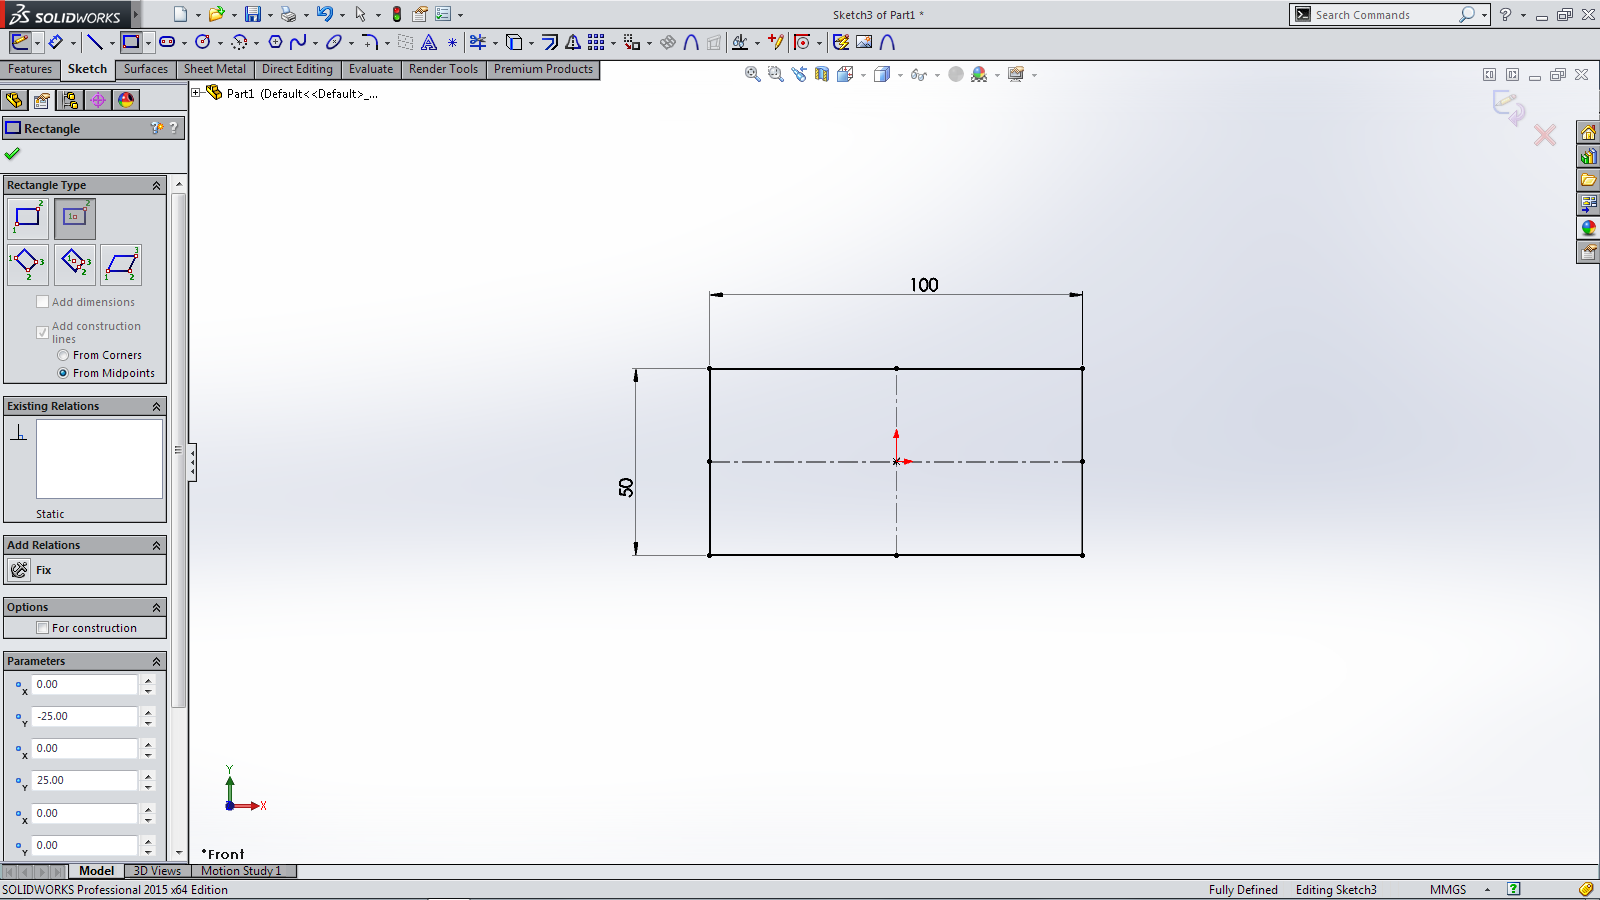 It was also once limited to just Sketch> Centre Rectange. However with SOLIDWORKS 2015 all Rectangles can have centrelines added from either Corners or Midpoints
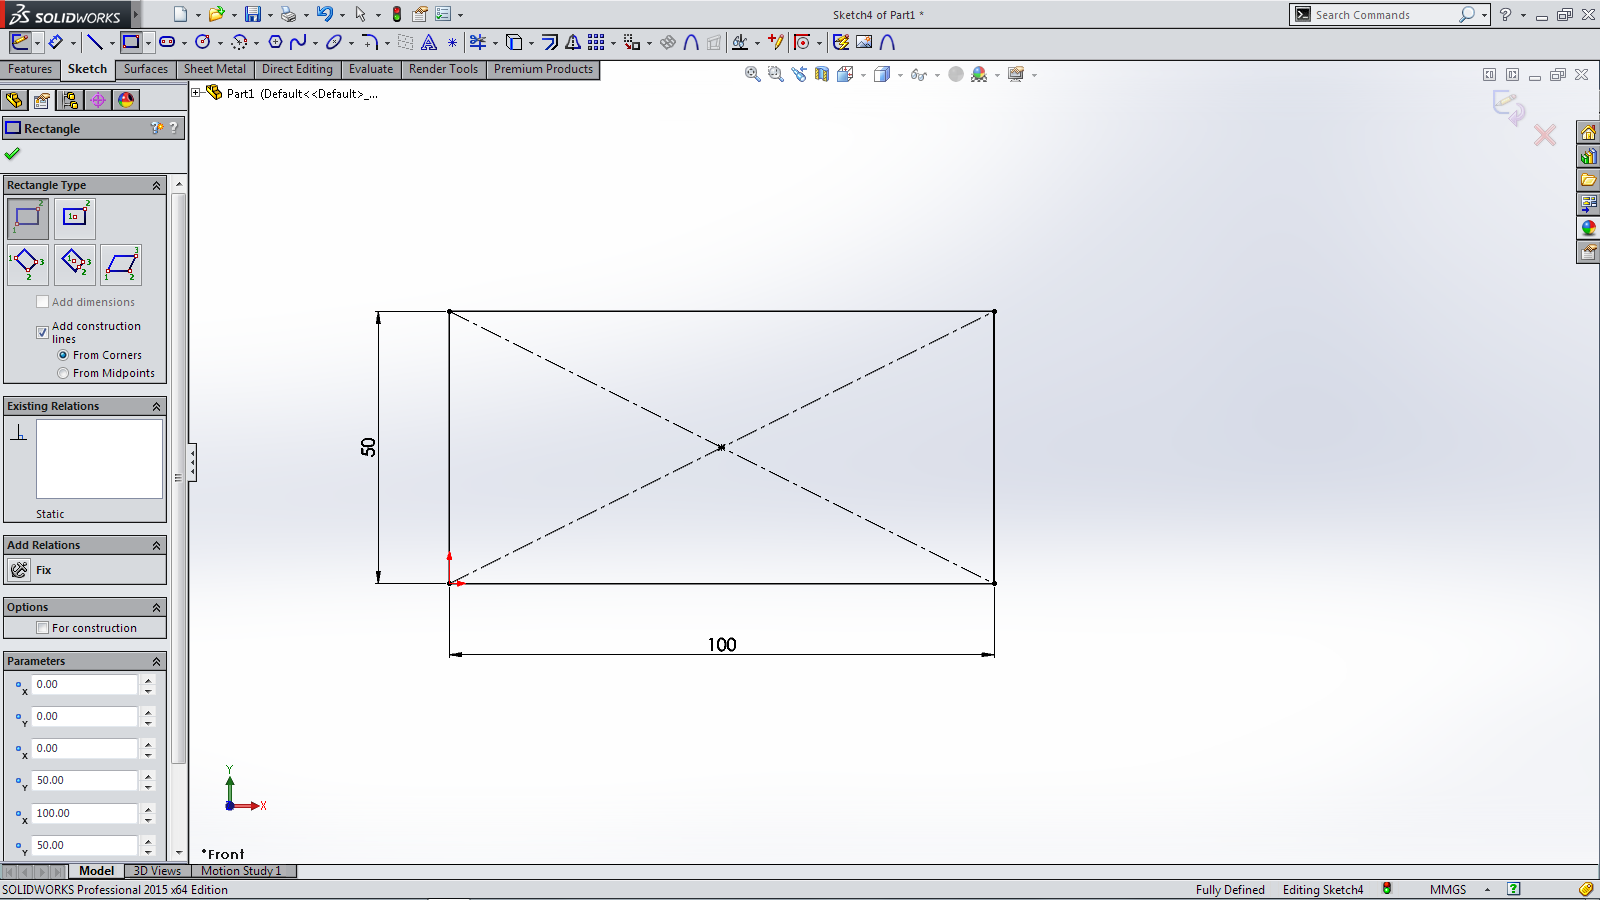 Whilst still in Sketch I had a first look at the new Segment feature. I can see the potential of the Segment feature. It can see a tremendous time saving not having to add many additional centrelines and equal references. Sketch>Segment.
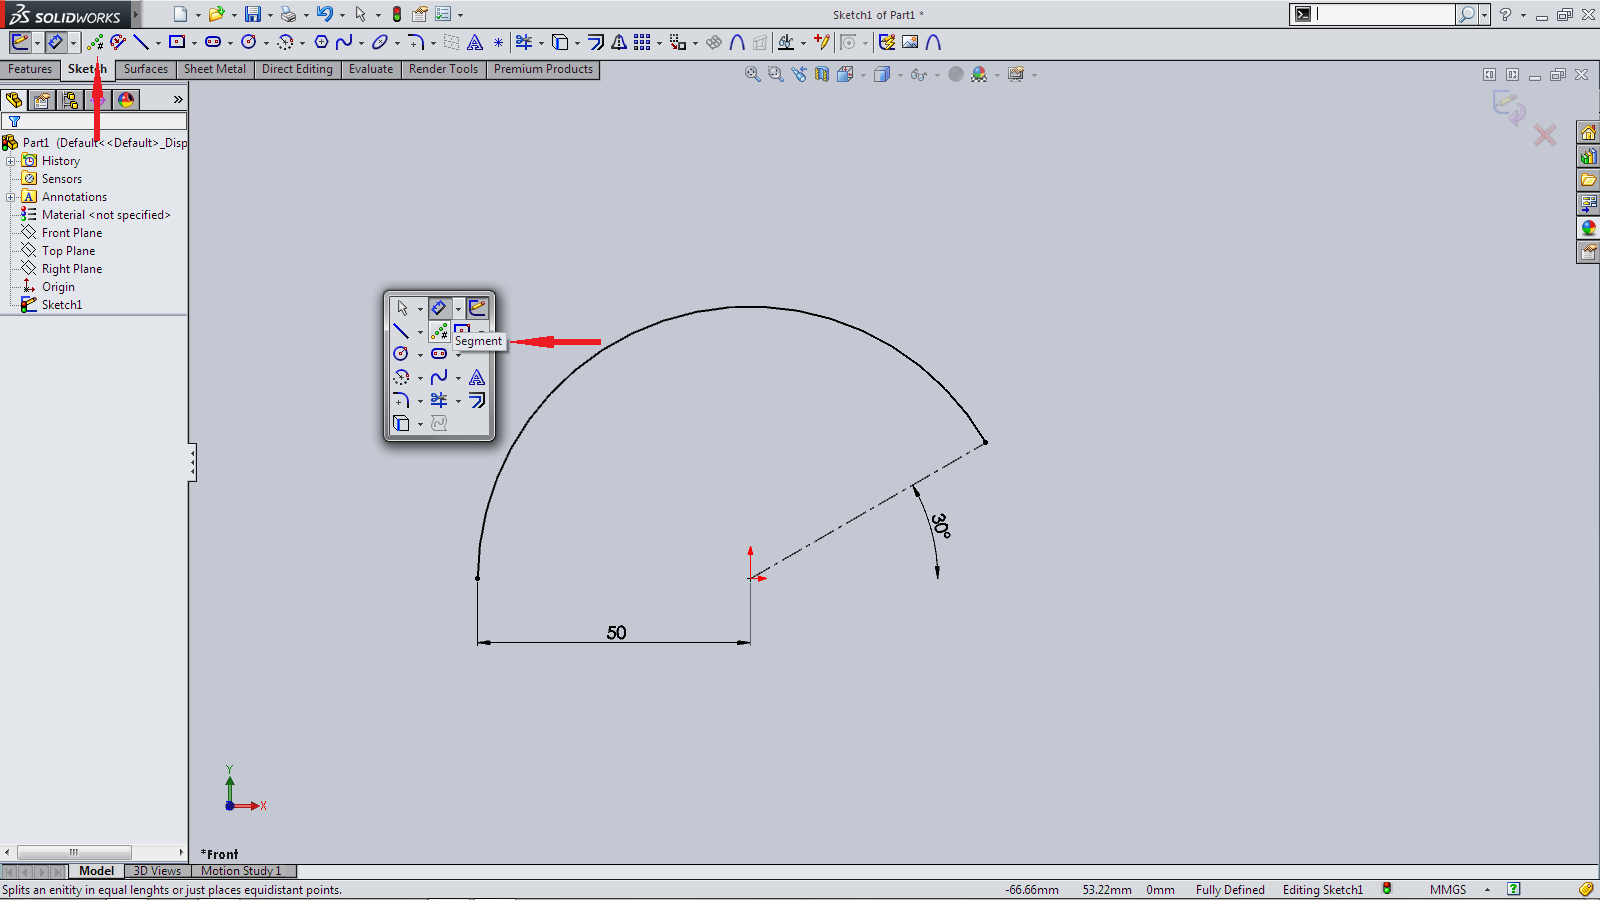 Selecting a line will give you two options. Sketch Points or Sketch Segments. Sketch Points divides the line with the equal number of (stated) points and adds those segment points
 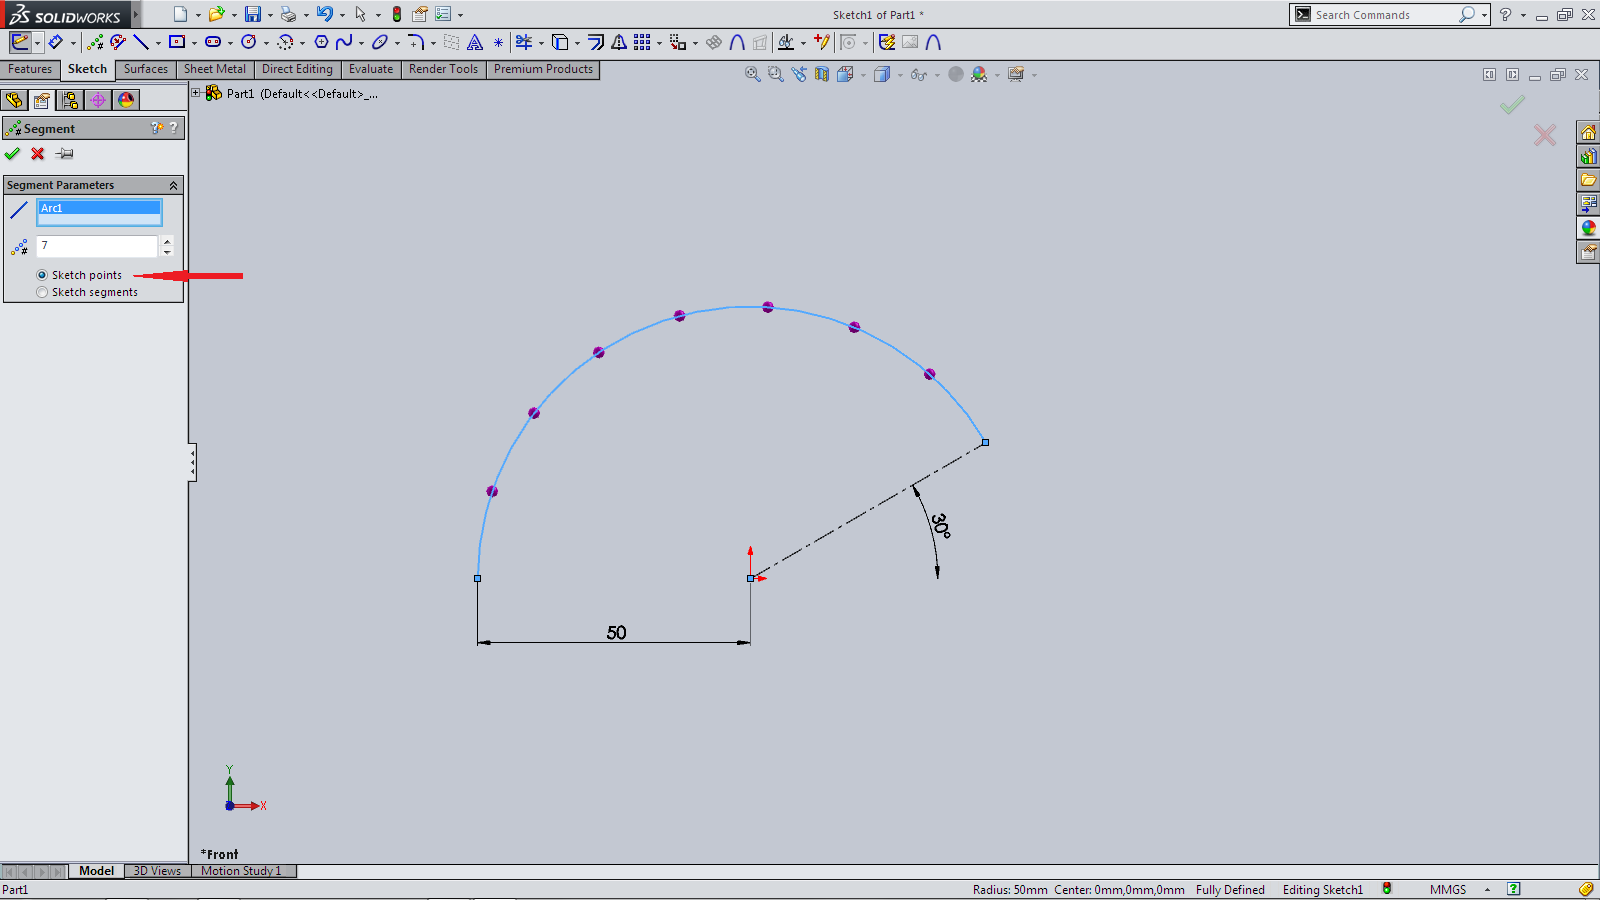 Sketch Segments not only divides the line up by the number of (stated) equal number of segments but also splits the line into that number as well
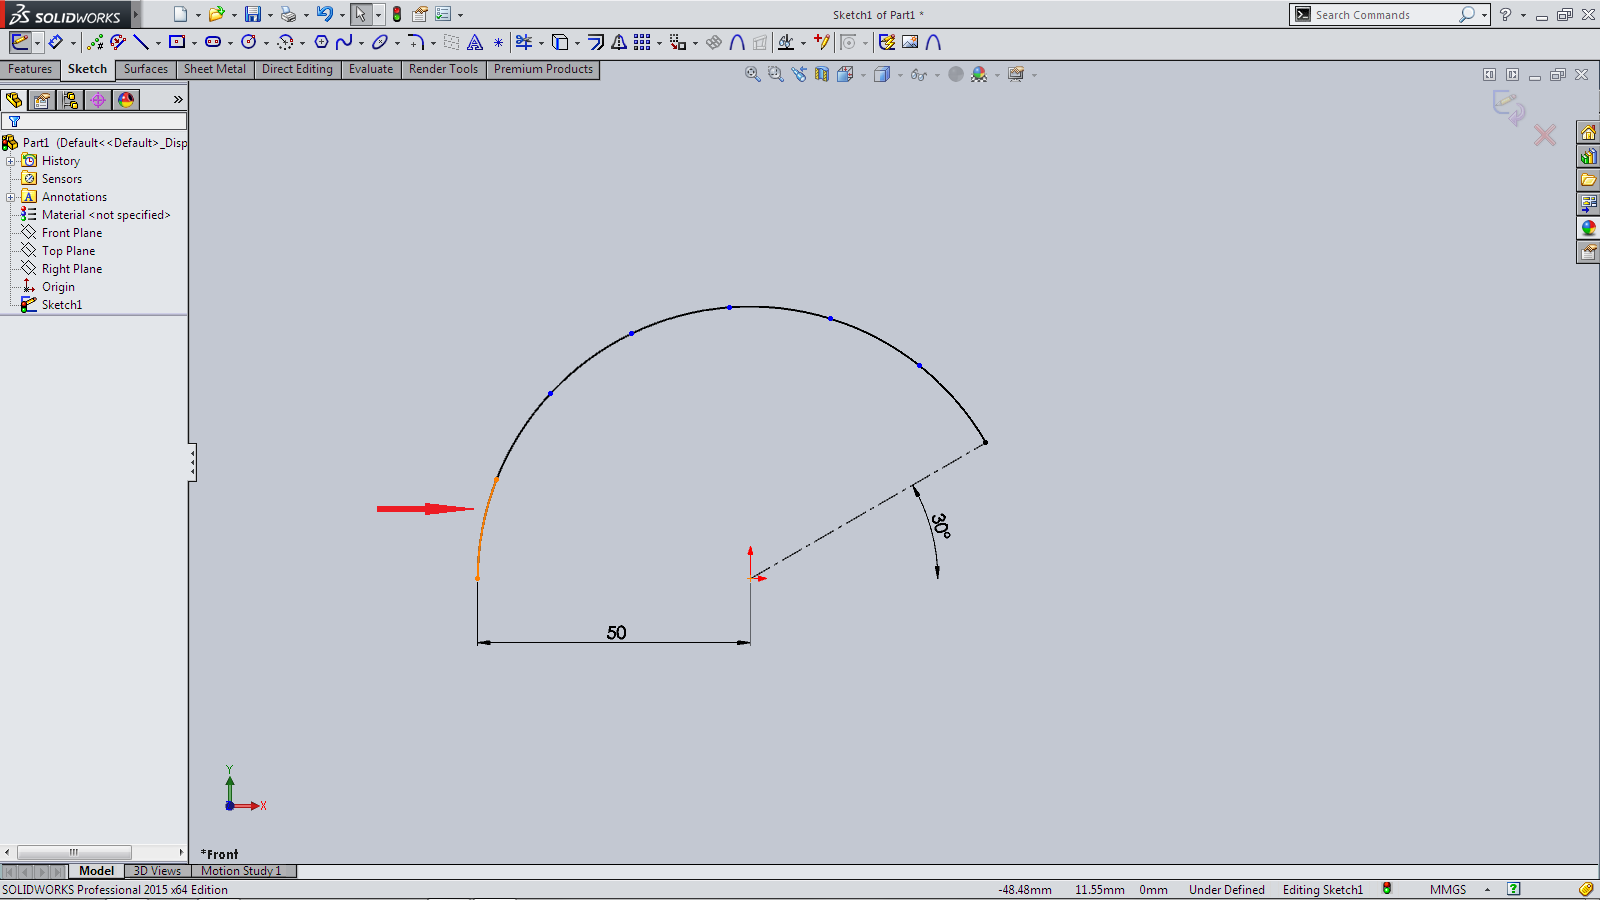 For those who use the Context Toolbar for Sketch Relations will like this. If you selecting a Shared Point between two Sketches
 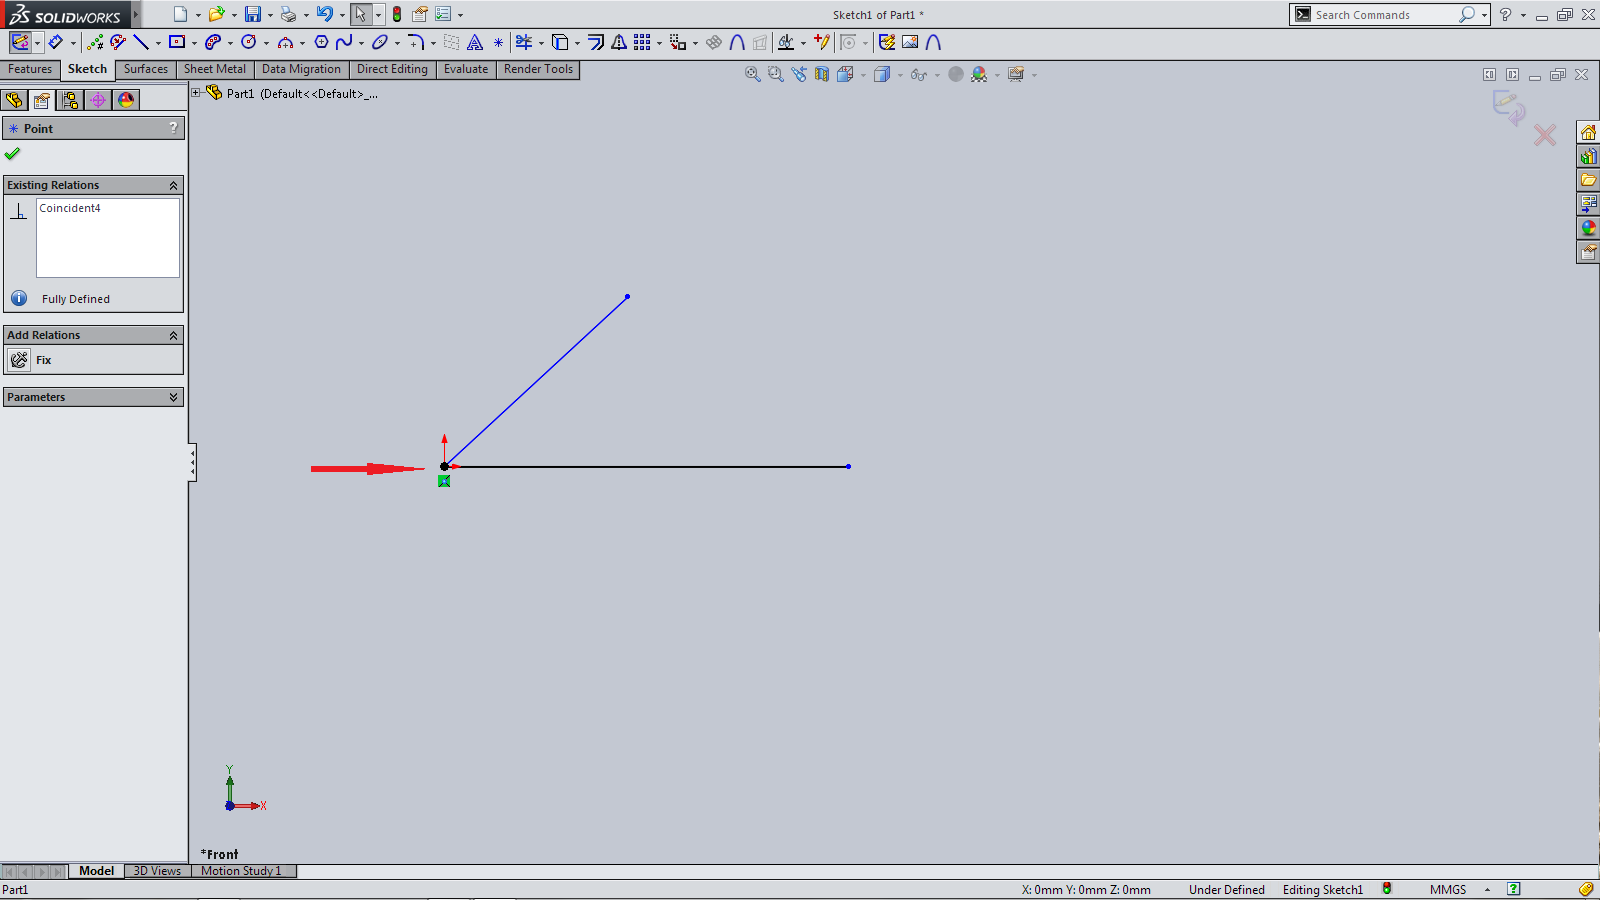 and open the Context Toolbar it now displays all possible relations.
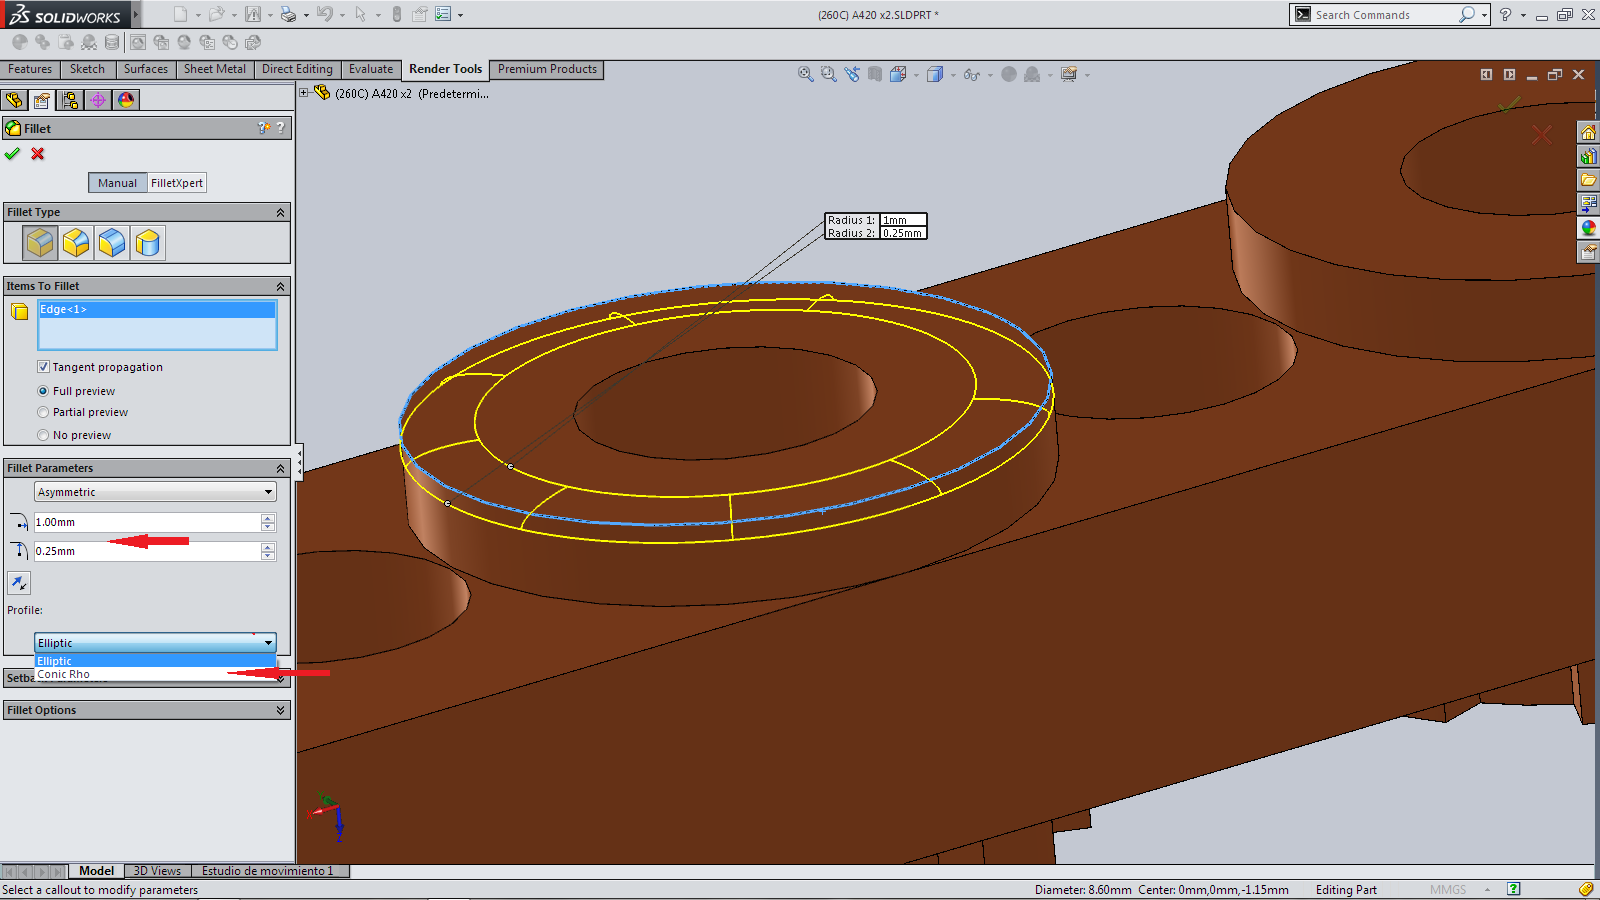
In SOLIDWORKS 2014 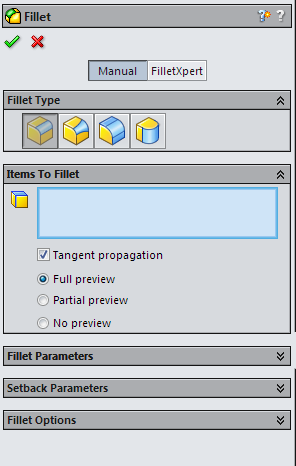 we started to see the introduction of pictorial/ graphical representation replacing descriptions for the features. It started with Hole Wizards and now with SOLIDWORKS 2015 it has expanded into fillets.
Now with all fillets (with the exception of Full Round Fillet) there is the option to have the fillet either Symmetrical or Asymmetrical. With Asymmetrical fillet you can set the Fillet Parameter by either Elliptical or Conic Rho
Talking about Hole Wizard there it now support for PEM® fasteners. Whilst it is great to see this added I could have done with this for the past 10years! I use M6 Self Clinching nuts in much of our sheet metalwork. So whilst the hole dimension of 8.75mm is imbedded permanently in my head for a M6 Self Clinching nut I have to look up the required hole size for the odd time I use other sizes. But not now! When we look in Hole Wizard>Holes
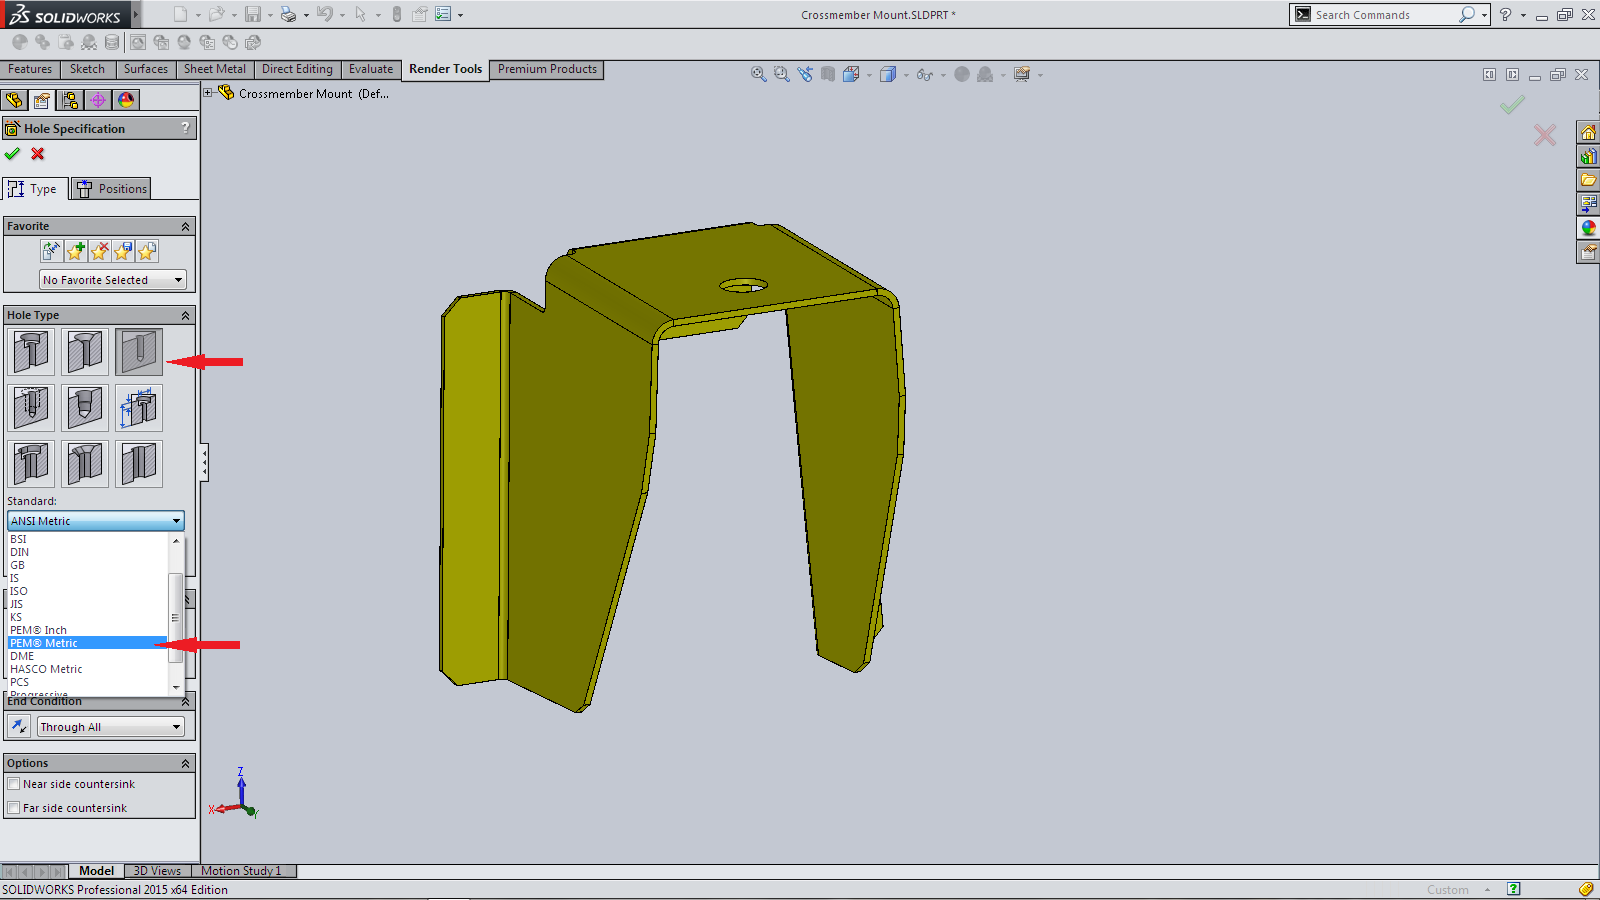 There is now PEM® Fastener> Type – for this I used the familiar Self Clinching Nut (however there is the full PEM® range)
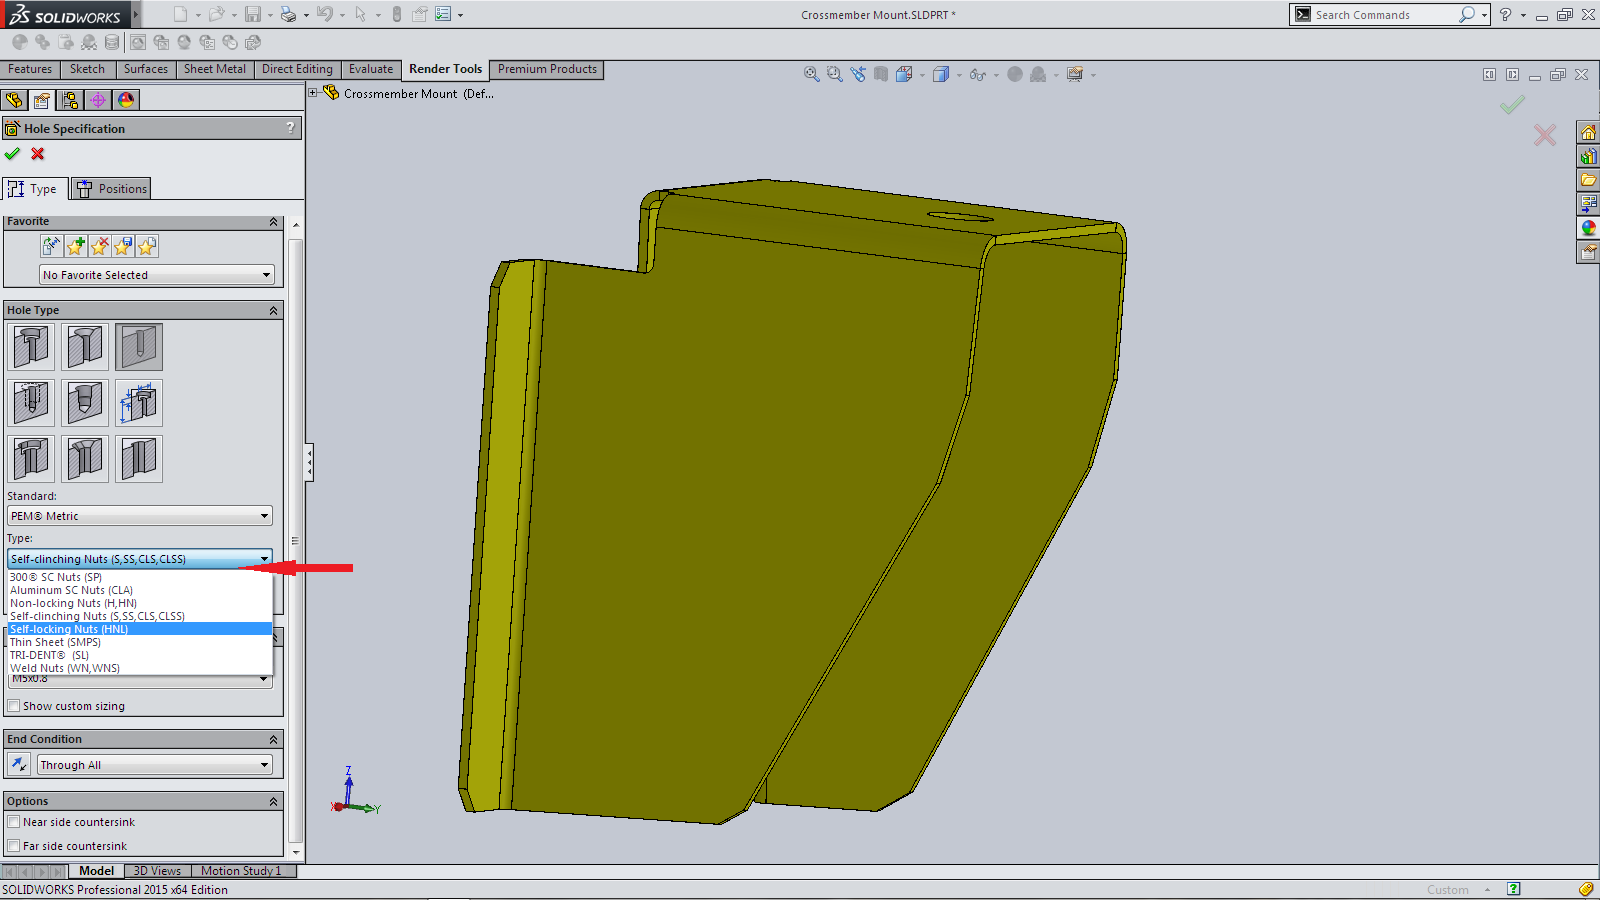 Size – for Metric M2 – M12
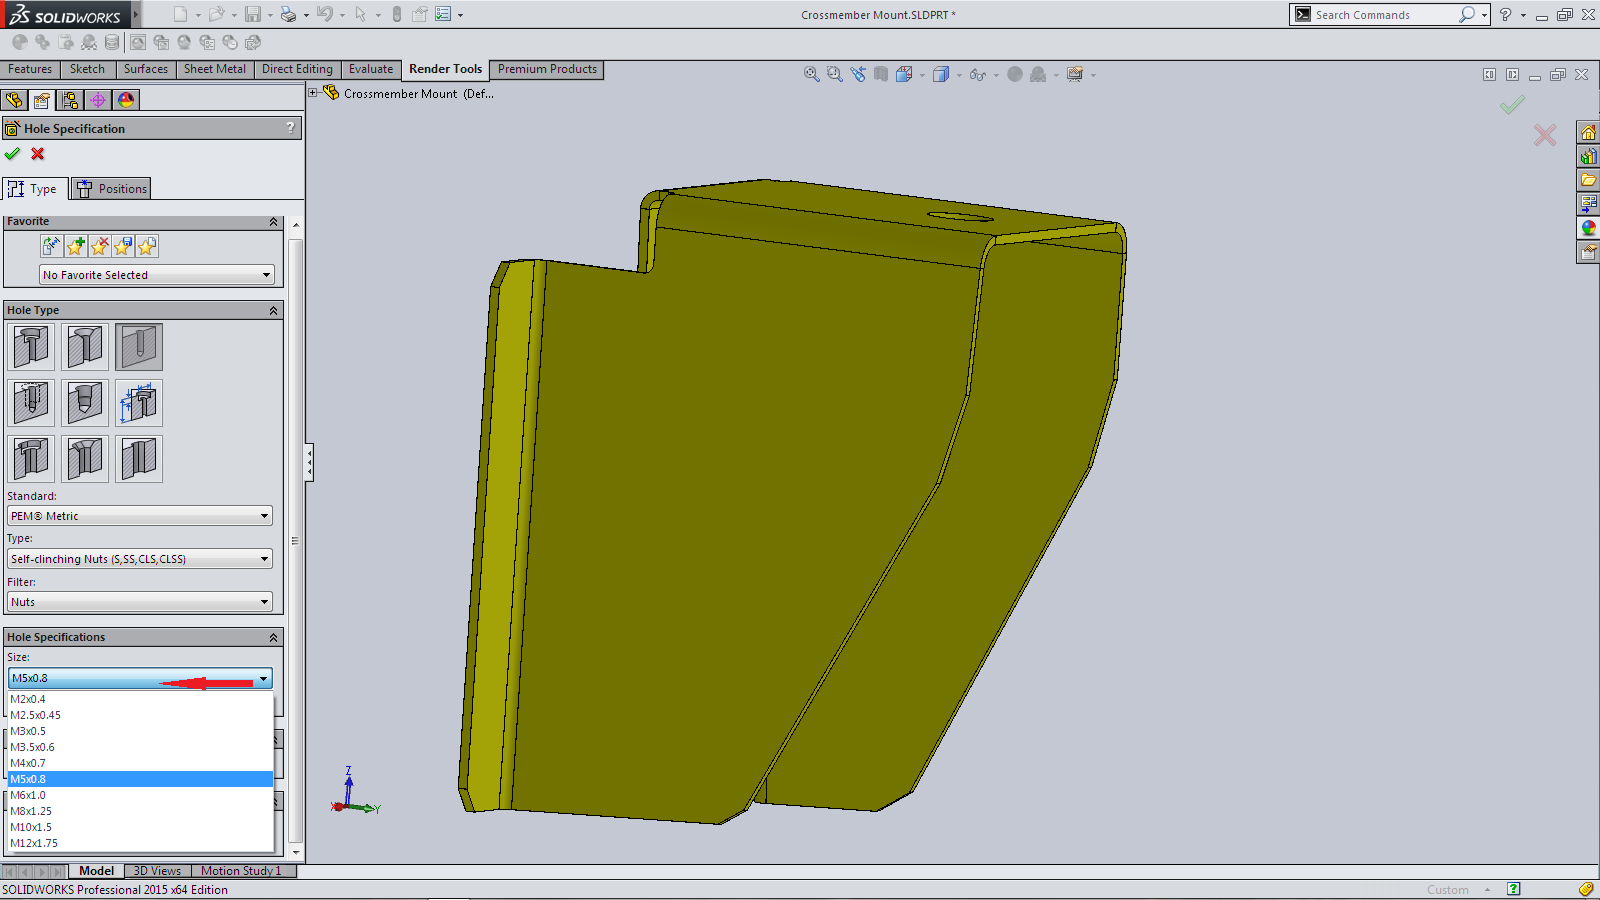 Then as per normal use of the Hole Wizard, select the faces> then add the position, number required and required Hole Size for PEM® – M6
 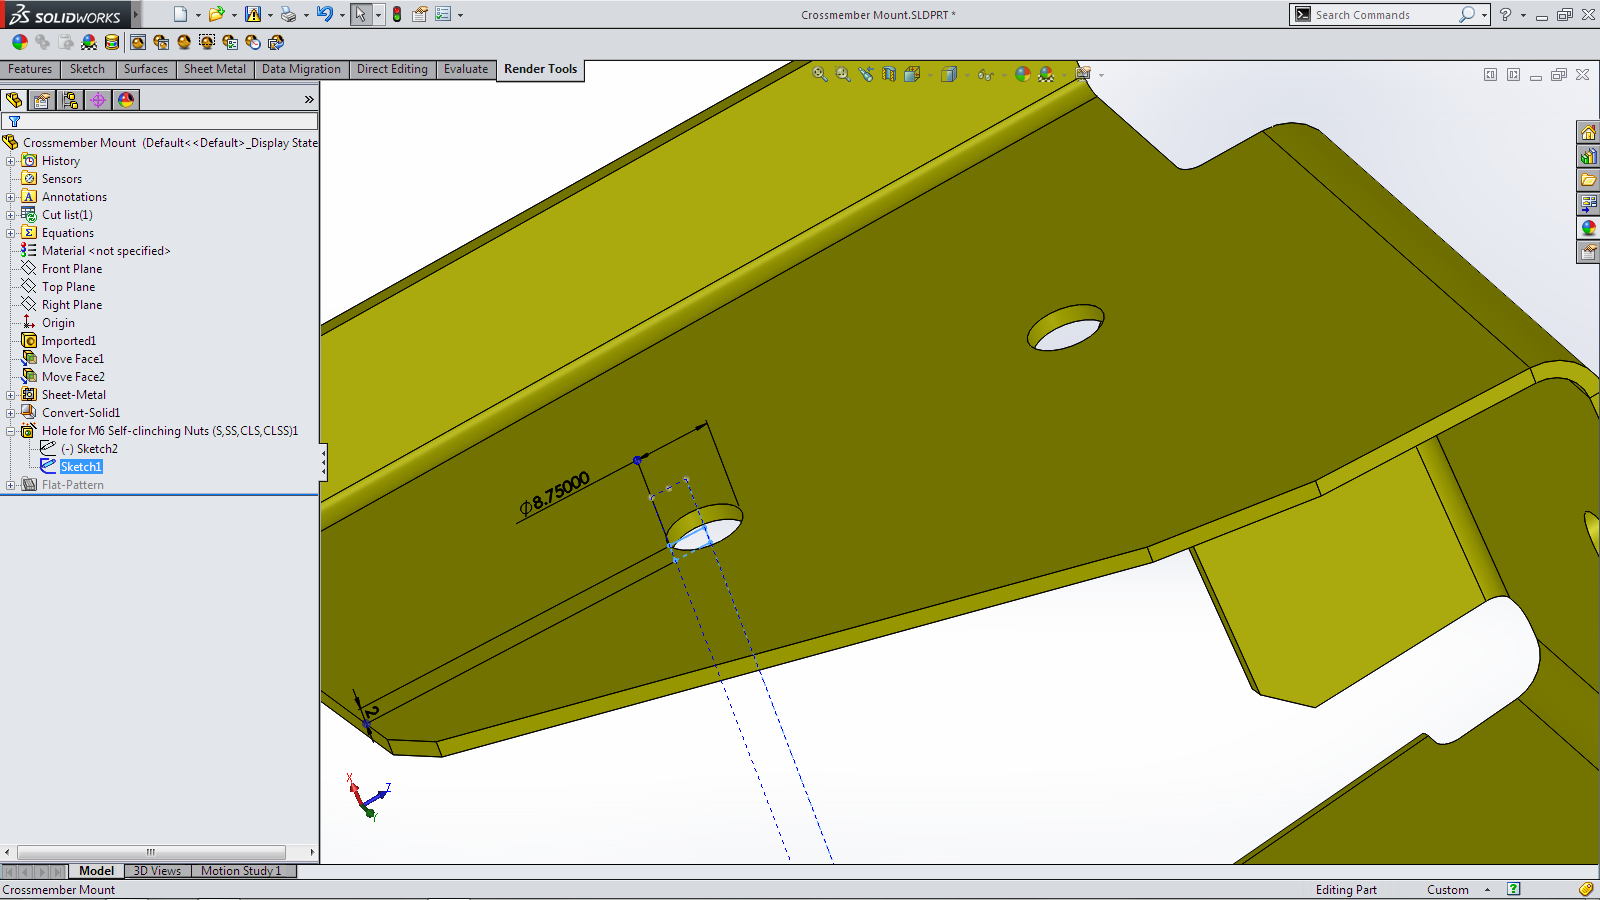 With the last new releases of SOLIDWORKS there has been an expansion to the type of files that could be opened. SOLIDWORKS 2015 see that expand into the ability to open Unigraphics/NX® (.prt) NX®8 – 8.5
Despite having quite a collection of NX files from Volkswagen but they are all from a much earlier versions. So I needed to find a file and borrowed one from GrabCAD. ![]() As with all non-SOLIDWORKS files it comes in as a Imported part with the option of running Import Diagnostics. With this case it need just one small face to repaired.
As with all non-SOLIDWORKS files it comes in as a Imported part with the option of running Import Diagnostics. With this case it need just one small face to repaired.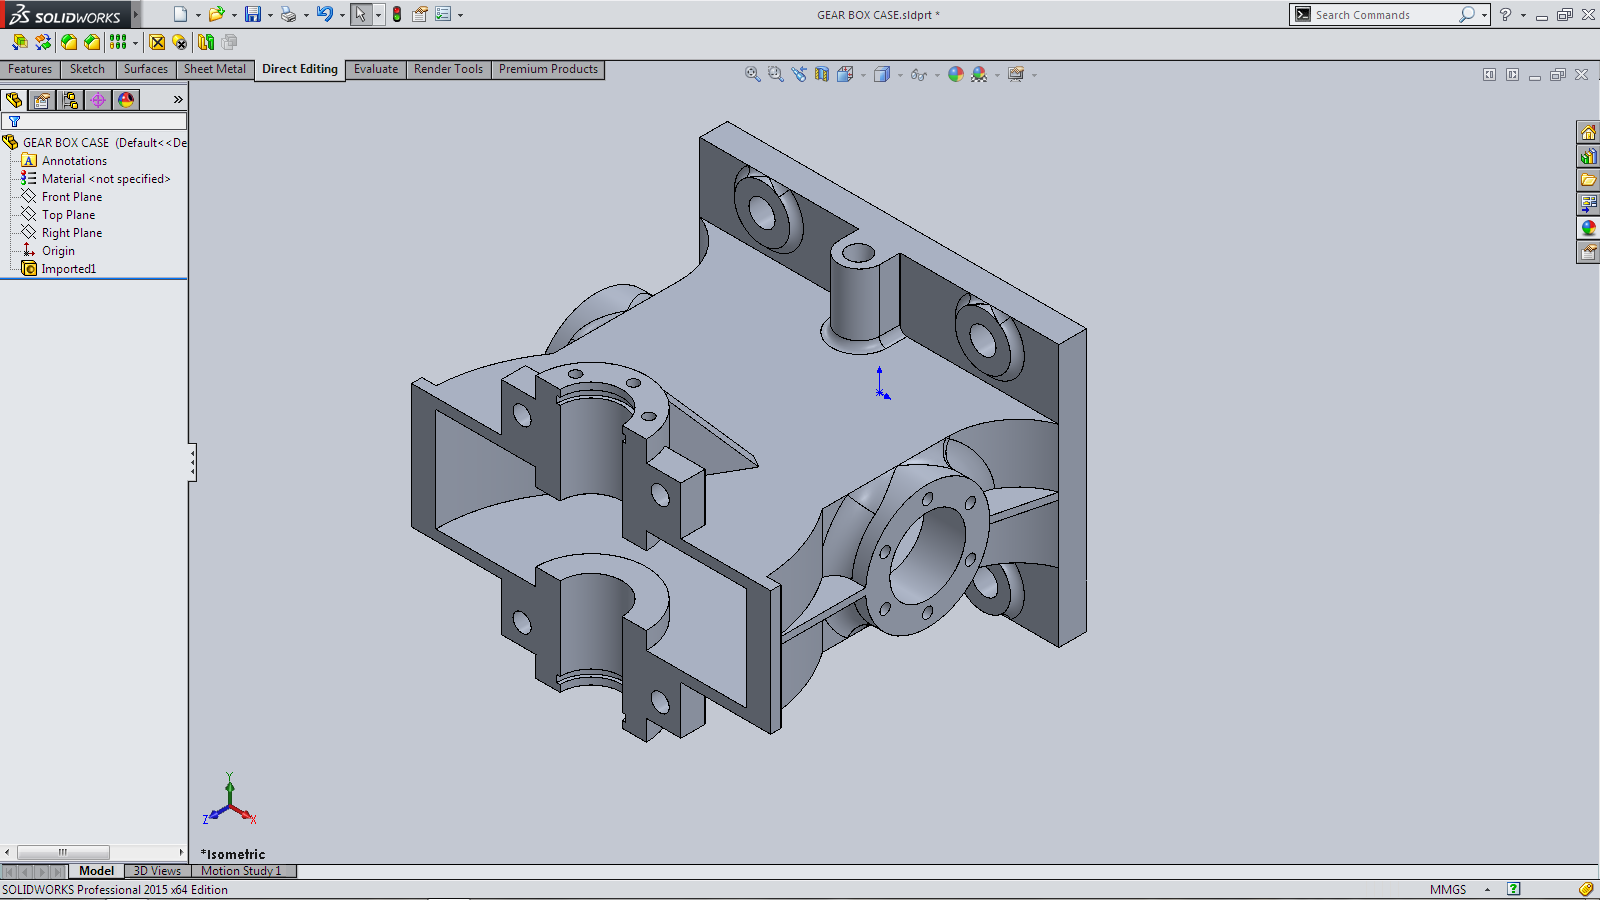 Whilst I had an Imported part open I had a look at the additional improvements to the Direct Edit Feature> Move Face. This is another of the features that now has a more similar interface and familiar workflow as of other features. The triad has now been moved to the centre of the selection. Dimensions can now be added in the call out box.
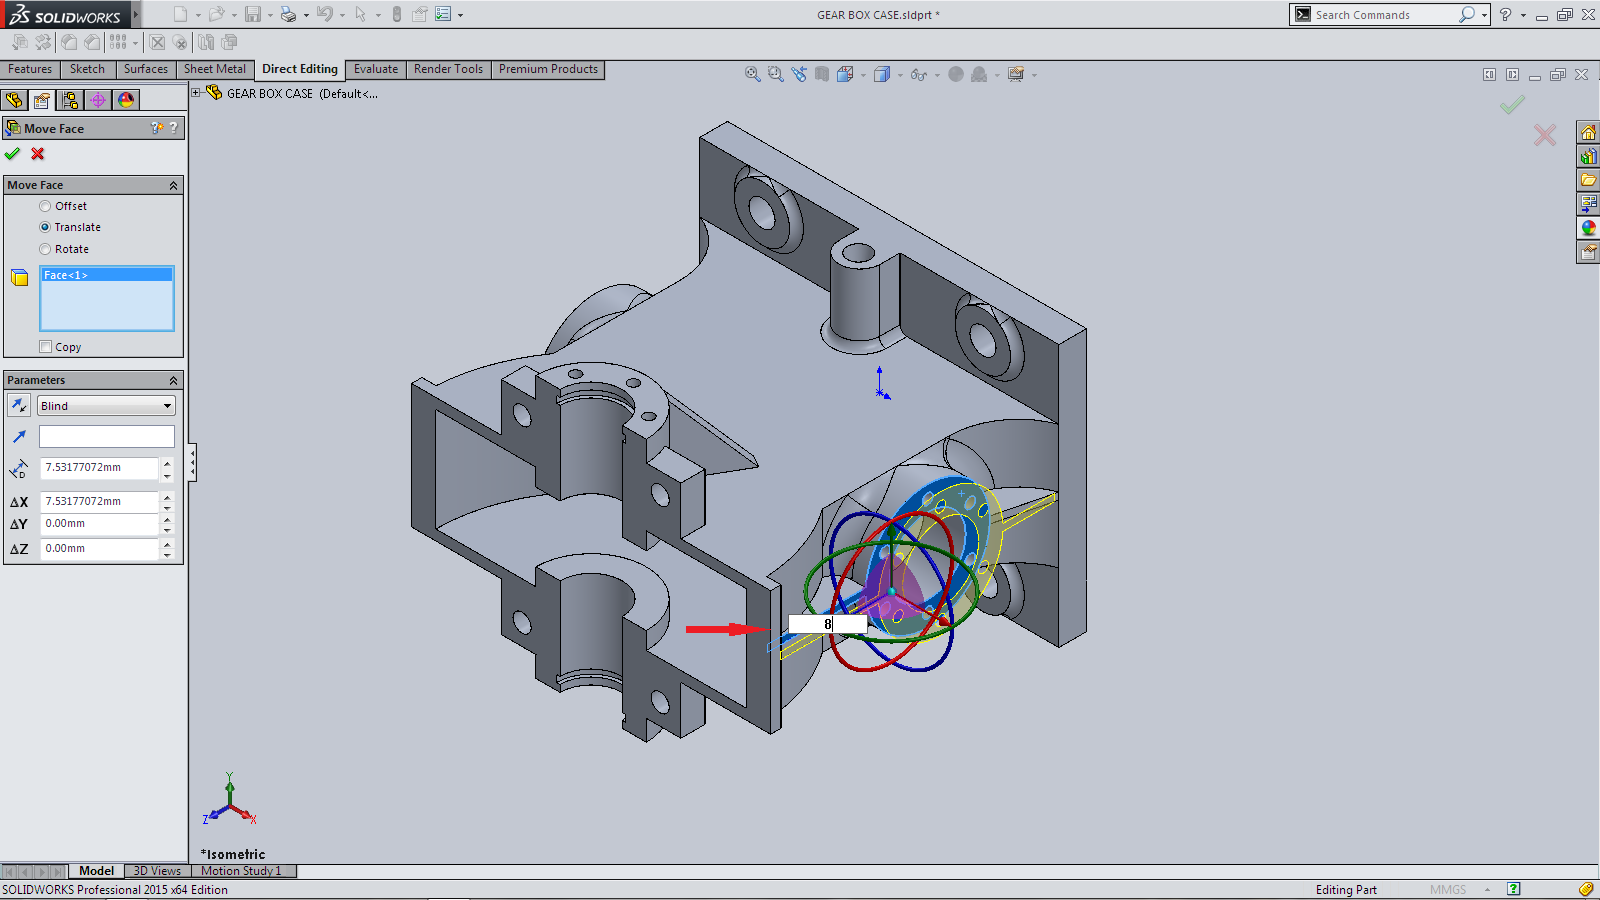 There in now the familiar Parameters to use with the Move Face Feature.
 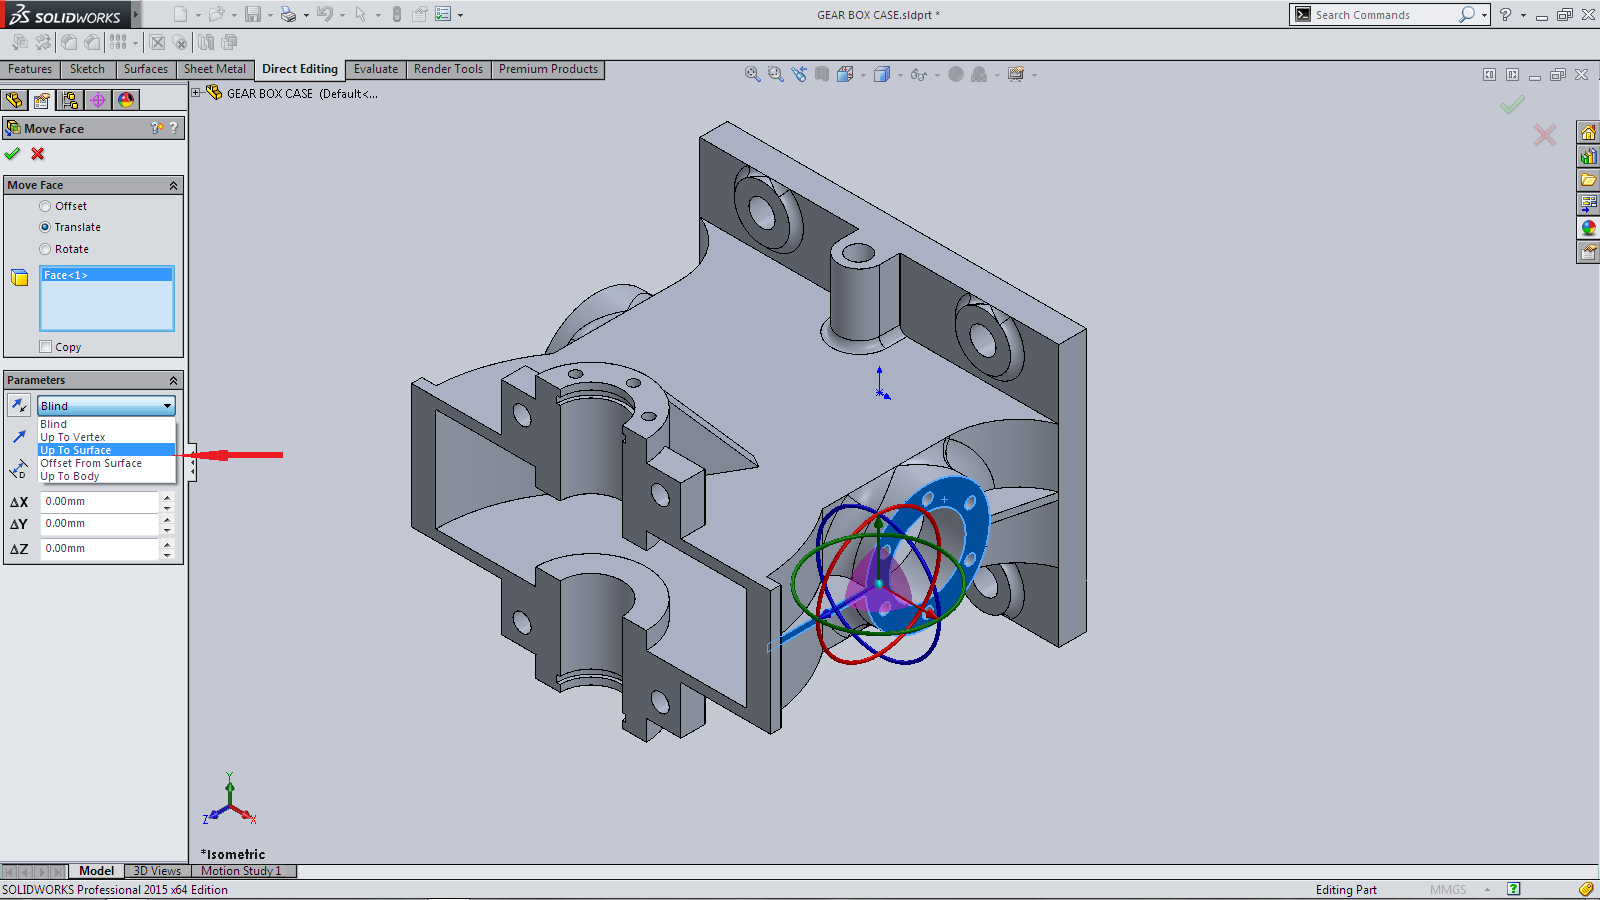 In this case the Up to Surface (select the face of the flange)
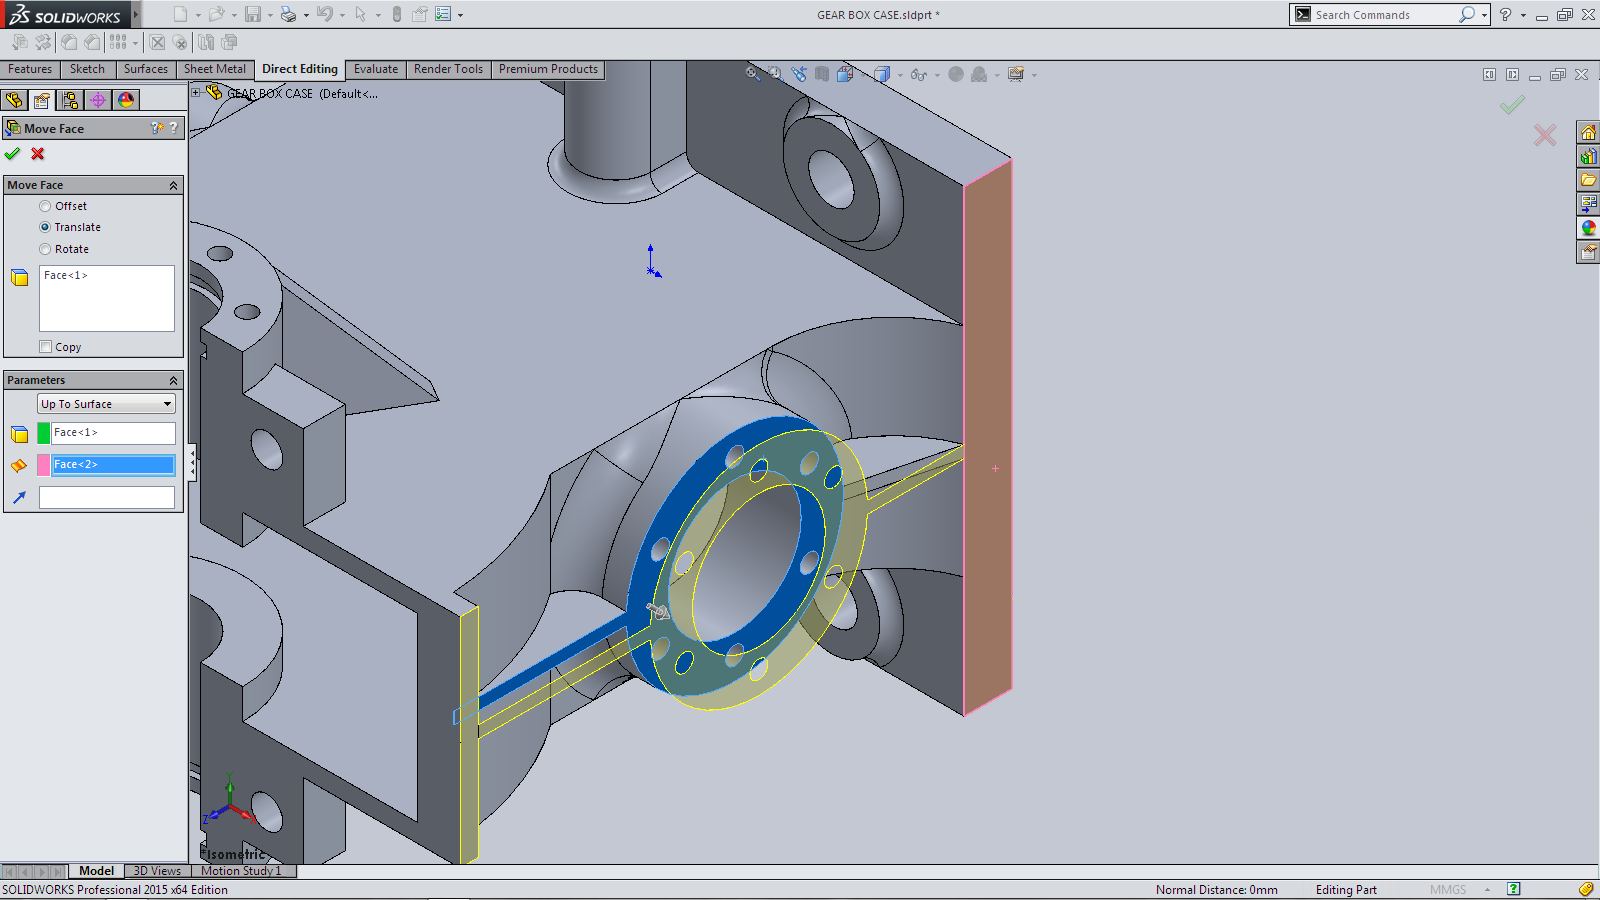
 I’ve never really adopted the View Selector. It stems from my early days of using SOLIDWORKS and setting Keyboard shortcuts for the views (F for front, R for right etc). With each new install I just continue to just keep grabbing the same file into the Copy Setting Wizard But I do like this enhancement. Now as you past over any of the faces of the View Selector you see a preview of that view. This might just be the incentive to move me away from using my Keyboard shorts cuts!
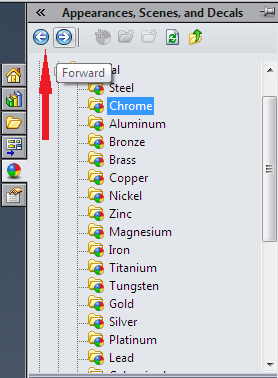
 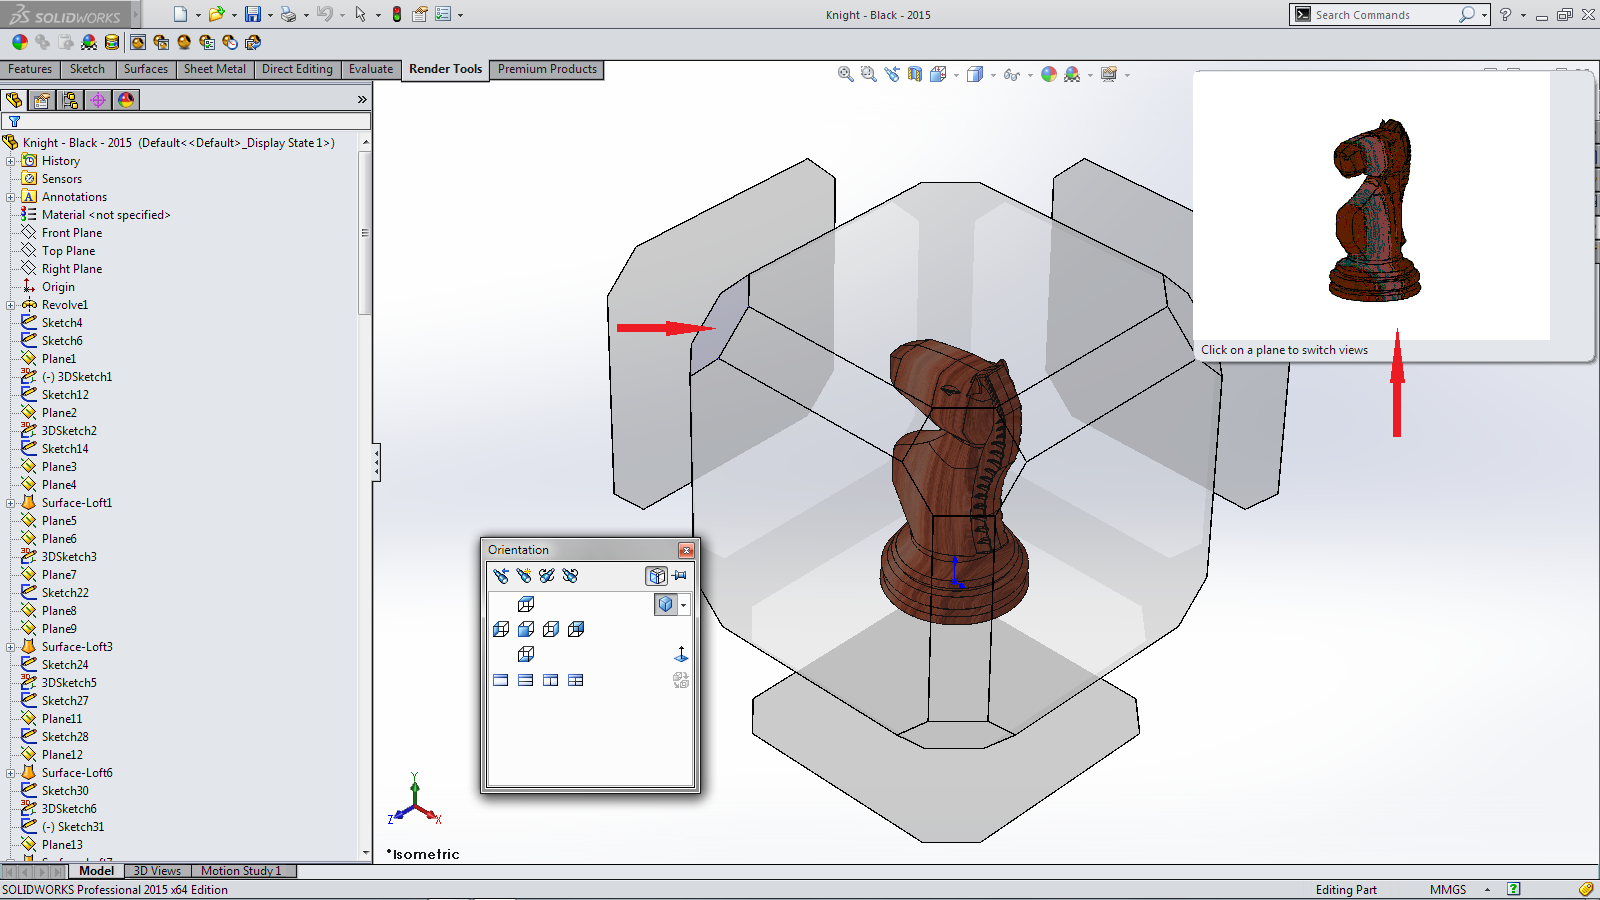 With the first couple of opening of SOLIDWORKS 2015 it took me a few minutes to process that something was something a little difference! There has been two new additions to the Task Pane. In the Appearances, Scenes and Decals there are now a pair of Forward & Back Buttons. You can now toggle back / forward through your folder selections. The same function is also in the Design Library however with that there is also a Toolbox Configuration Button.

 When selected the Toolbox Configuration opens a window that then allows you to customise what Hardware you want to install/ displayed.
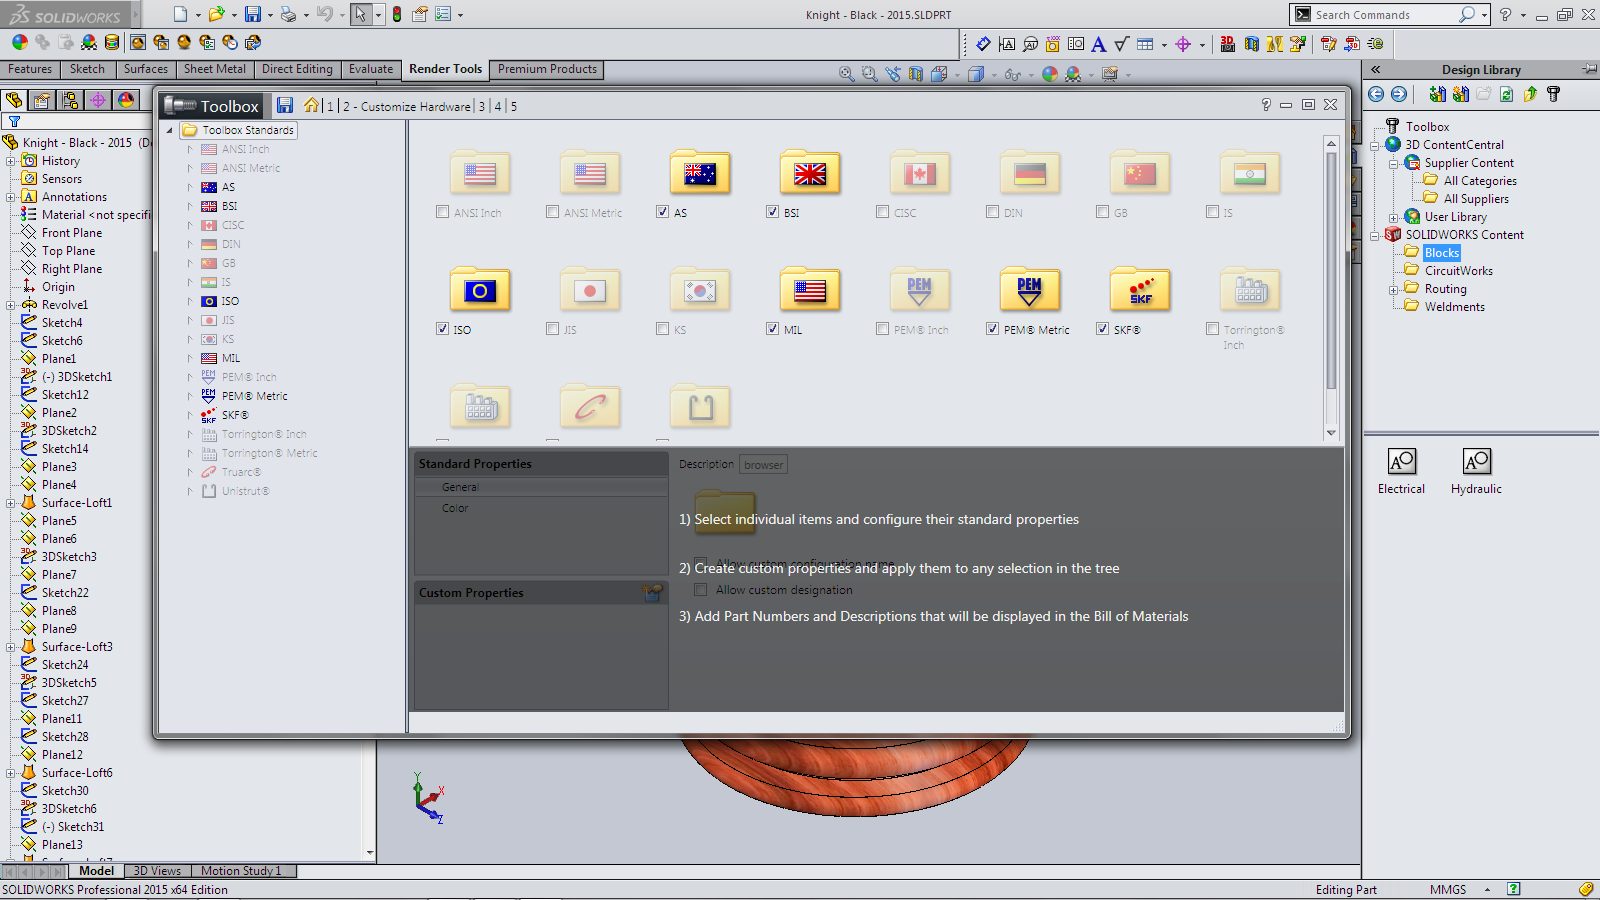
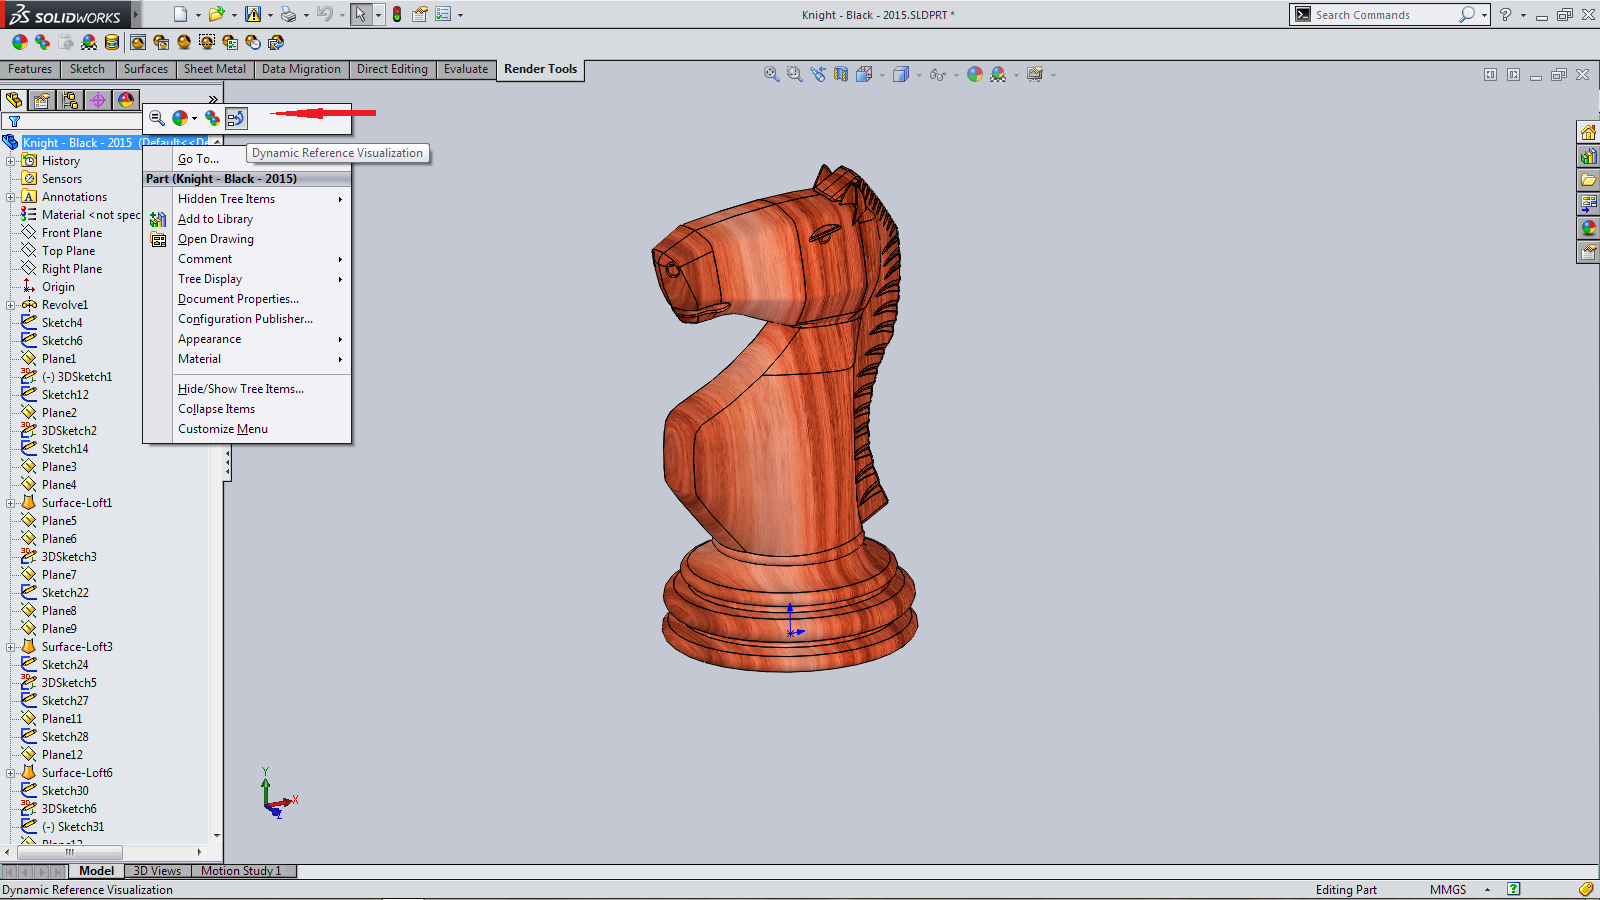
This is another very interesting new feature. You now have the option to view feature dependencies with the Dynamic Reference Visualization feature. The Dynamic Reference Visualization gives you a graphical display in the Feature Tree. I had to first turn it on for it to display. For that you need to Right Button the first feature (Part/ Assembly) of the tree. Then Tree Display > Show Dynamic Visualization
UPDATED: When I first looked at the Dynamic Reference Visualization feature it toggled on and off via the Tree Display. That was when it was still in Beta! With Pre-Release 1 the ability to toggle the Dynamic Reference on and off has been moved to the Context Toolbar
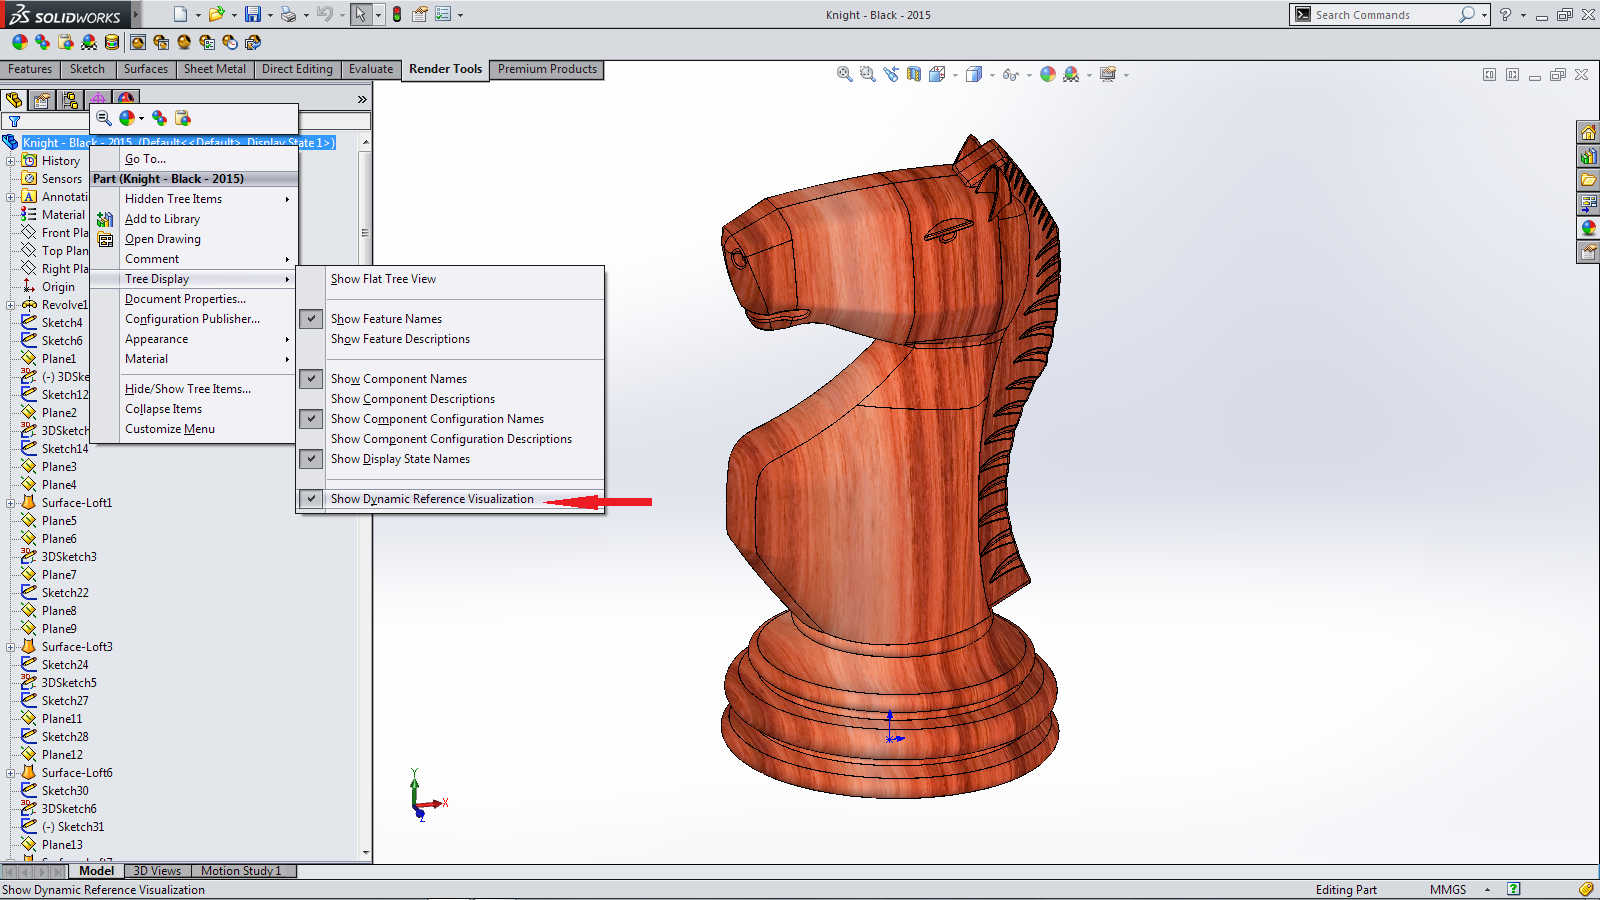 Then as you pass over the Feature Tree the References are shown with arrows that point to each sketch/ feature that are referenced. If a feature is not shown (in the tree because it is to high or low to be displayed) it is then named and displayed in a text box
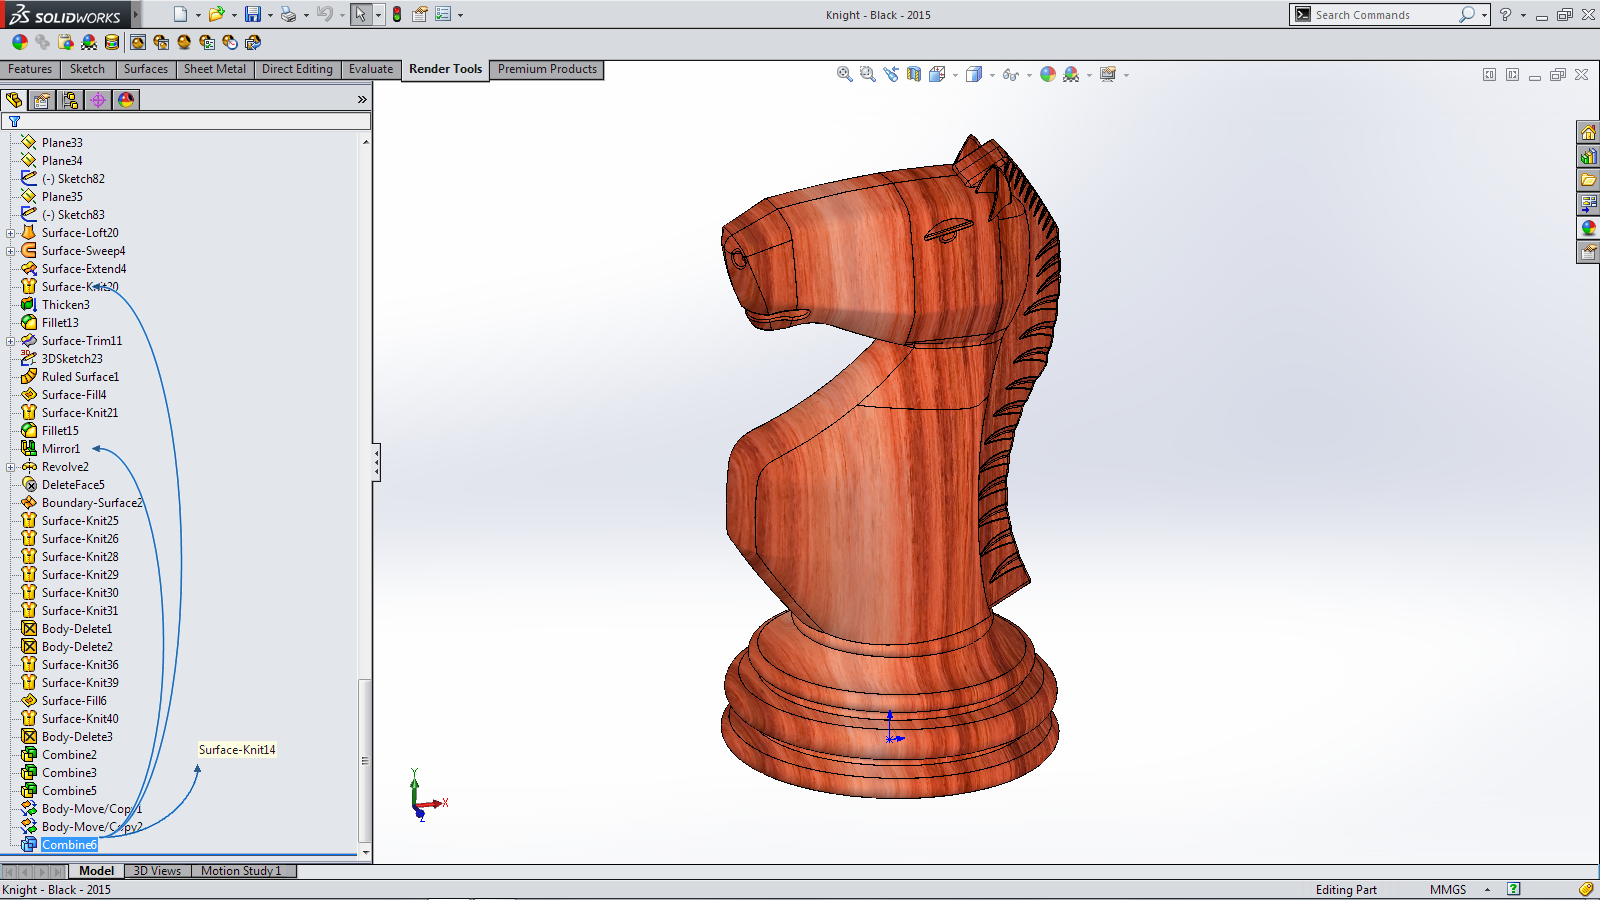
Whilst talking about visualization. You can now Preview Hidden Components or Bodies. Selecting the hidden component (or body) either single or +Ctrl for multiple components (or bodies) from the featuretree  Will display a transparent preview of the component(s) or body(ies). To clear select in the graphic area
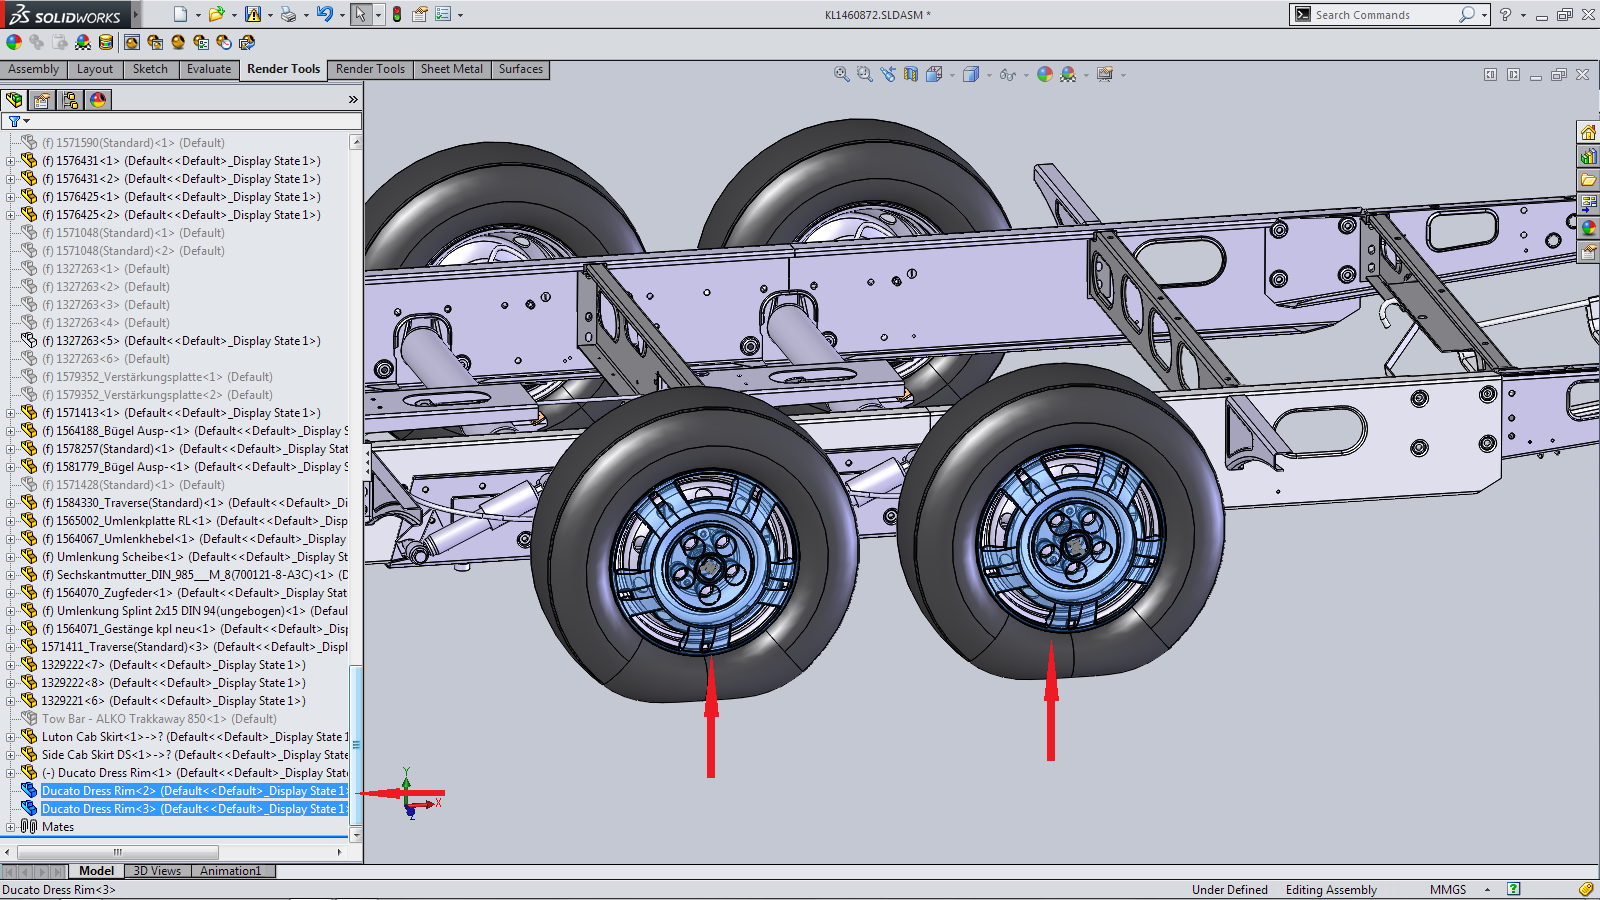
This is one for those who need and use a number of different SOLIDWORKS versions. I’m fortunate that I don’t but for anyone who does this will be a huge bonus! With either SOLIDWORKS Explorer or Windows Explorer (in the detail pane) you will now see which Version (Identify File Version) the file was lasted saved in. That’s going to make a few people very pleased! 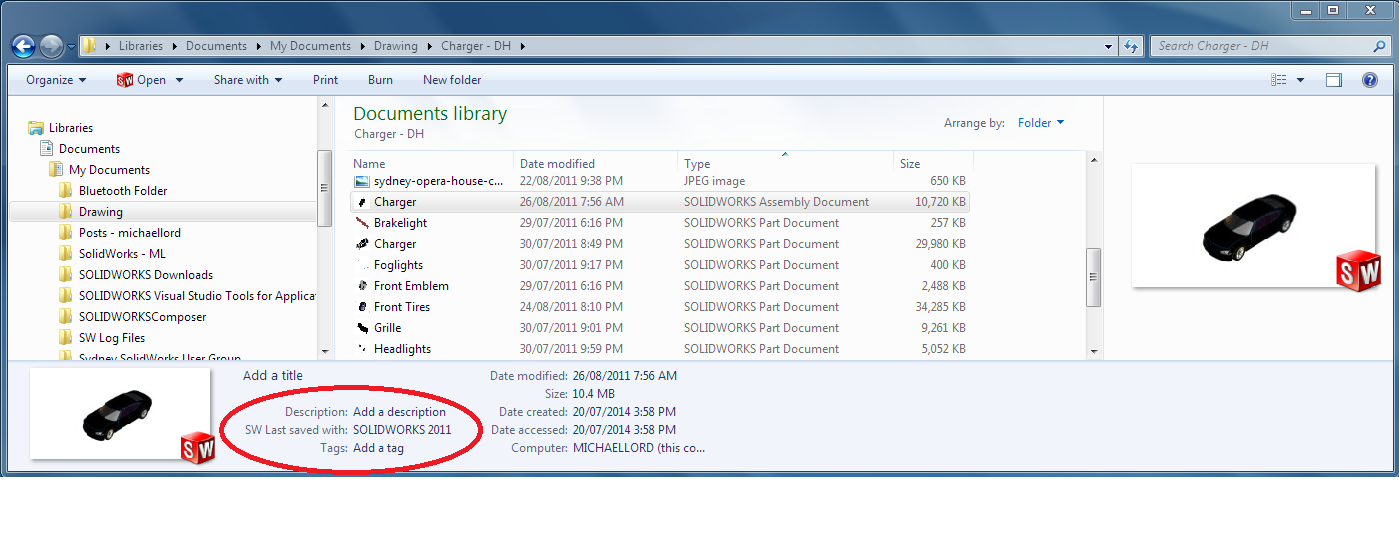 The information can also be accessed in a file opened in SOLIDWORKS 2015 via the File> Properties
 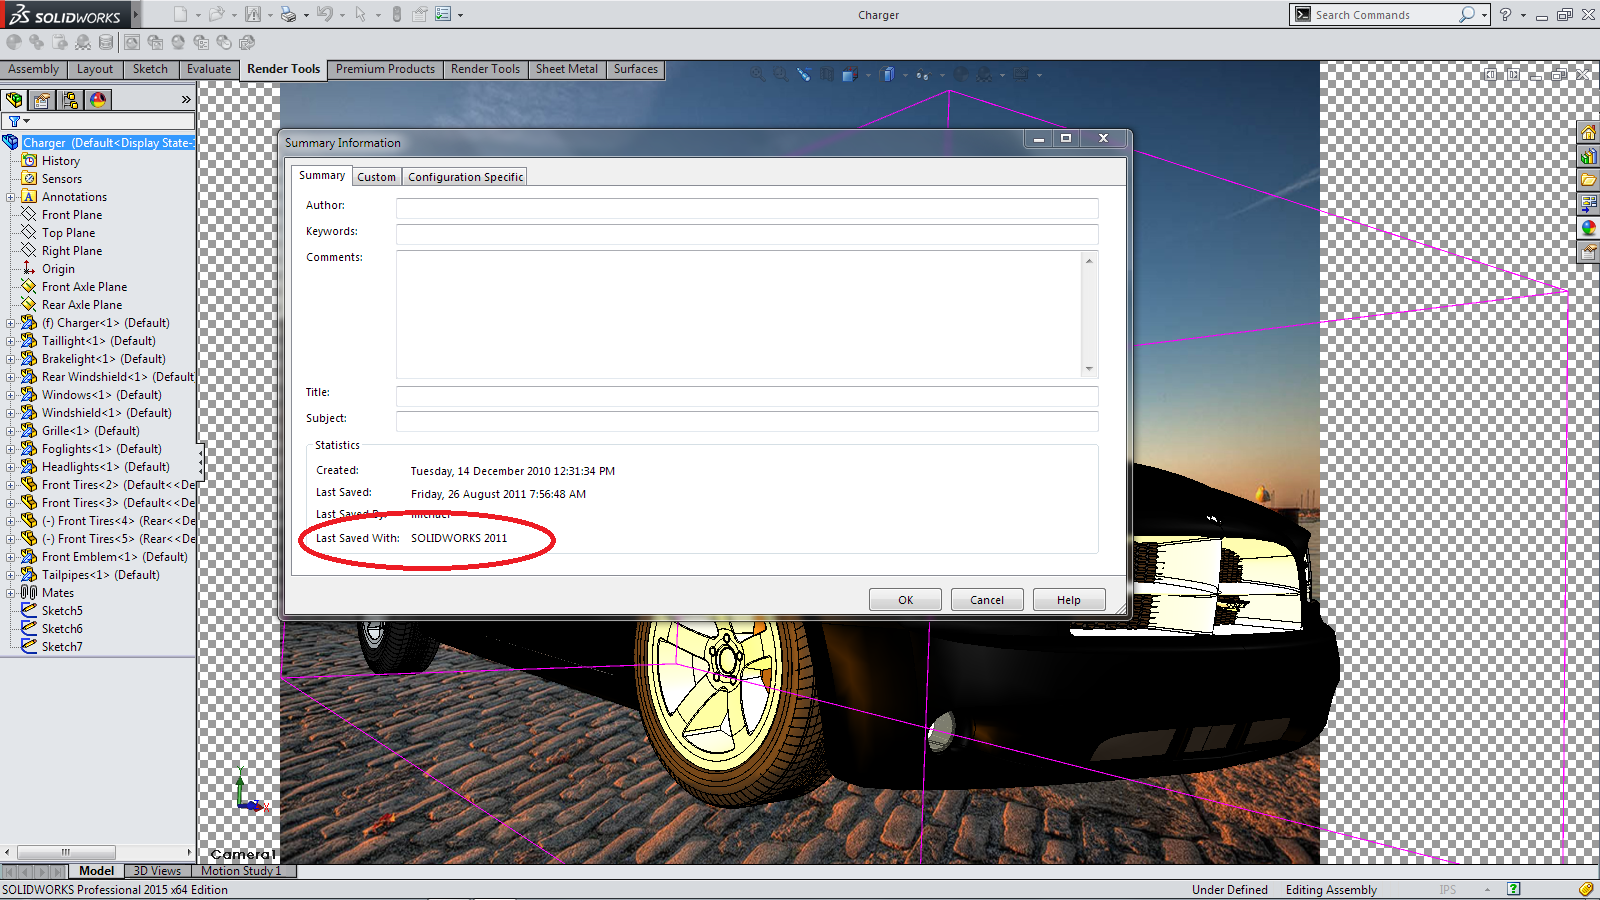 In the same vein as File Identification and for most likely a very similar reason the Year version has been added to the Desktop and Taskbar Icons
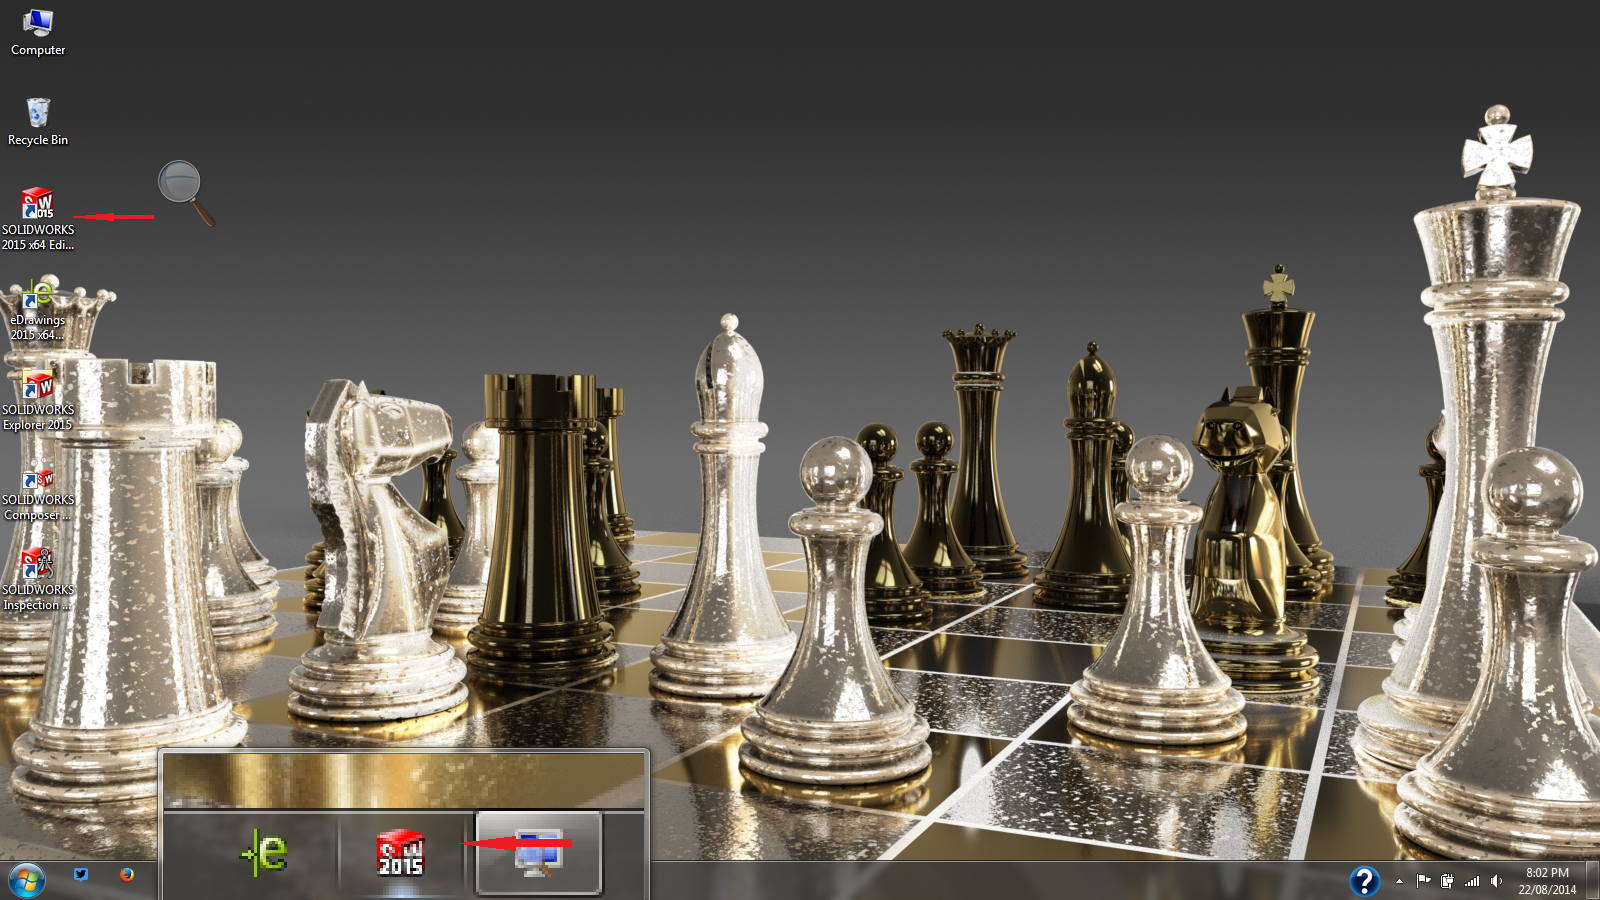 With this first read though and a few hours spent in SOLIDWORKS 2015 these were just a few of the many new features that I think will make this another very good release. I’m looking forward to next time and a chance to Dig a little Deeper into SOLIDWORKS 2015!

Leave a comment