
I like to render, I’ve only ever use PhotoView 360 both as a standalone program and as an integrated tool inside of SolidWorks. I’ve been keen to try KeyShot for a quite a while so with the release of KeyShot 3.1 I thought it was about time I did.
KeyShot allows a 15 day Trial long enough to trial and convince yourself that you can’t do without it!
So what better way to see what KeyShot can do was to dive straight in and start to Render! Common sense would be to read the Instruction but what better way to see how intuitive the software is but to try it.
One of the new features advertised with KeyShot 3.1 was Metallic Paint Flakes. What better way to see what Metallic Paint Flakes can do than to Render Automobiles! What better car to choose than the outrageous Pagani Zonda. A quick download of the Matt Perez Zonda on GrabCAD. Matt produces some of the best graphically representations of cars and has written tutorial of them on his SolidWorks Lessons site. (For those less time poor (read lazy) than I)
Rendering a Pagani Zonda in KeyShot 3.1
Adding Materials are a straight forward drag and drop on to the part. (Once it was pointed out I had to Unlink Materials so it didn’t just add the one Material to the whole part/assembly). The main exercise here was to see what Metallic Paint Flakes was about. A good Zonda colour has to be Paint – Metallic Scarlett. Dropped in a Background and Changed the Environment to Overhead Array (because I like the shadow effect it produces and adds “dimension” to the vehicle shape)
This was the first result!

The nice thing is that the Material – metallic flakes are fully adjustable. So I cranked up the Metal Flake Size

To produce a 1970’s style of Metal Flake Paint finish. (For those old enough to remember early Metallic Paint Finishes)

A little too metallic for today’s style of vehicle, so I backed off the metal flake and increased the Clear Coat Refraction

To produce a much “deeper” paint finish.

So those were the first few renders. With more adjustments to make I changed to a plain background and adjusted the camera.

24mm Camera and a slight adjustment to the angle.

A change of colour was as simple as dragging a new colour (Metallic Forest Green) to the part. The metal coverage can also be adjusted. So I pushed it up!
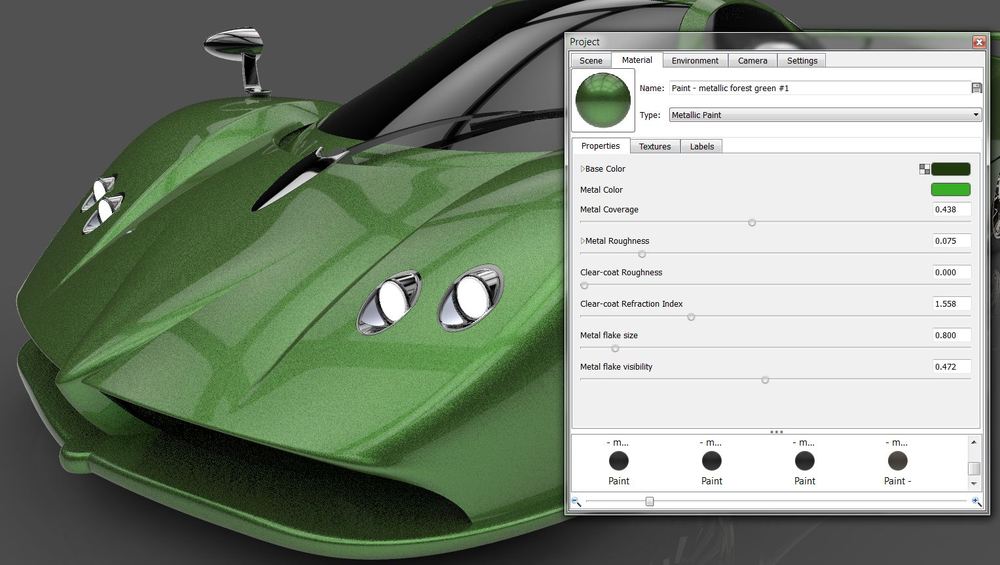
To produce a more metallic look!

Another change of colour (Metallic Black) The metal flake colour is also adjustable, so I changed it Gold.
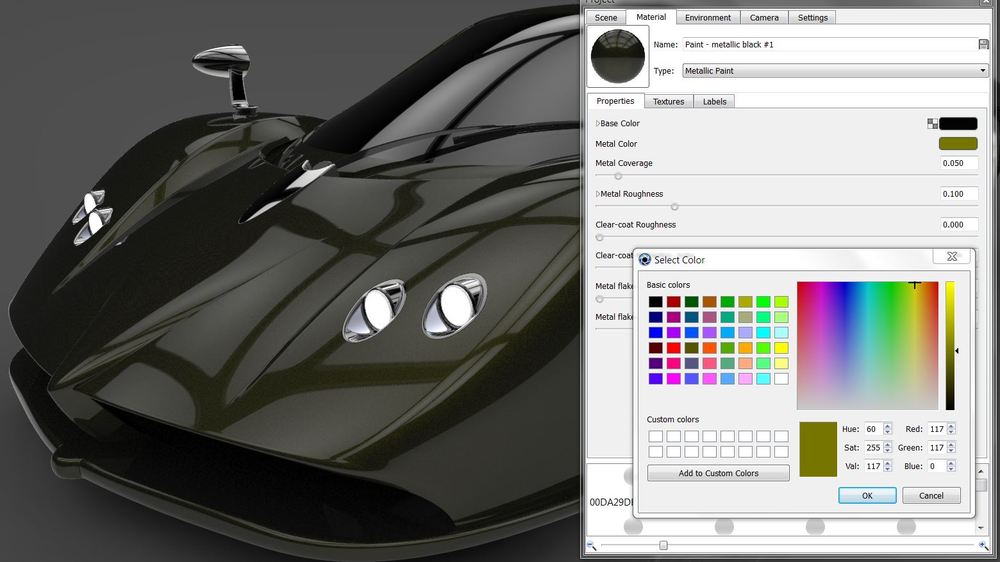
To produce a two-toned reflective look!

Another change of metal flake colour (Red) to produce a different look!

This was my first look at KeyShot 3.1 and it’s an impressive tool. As KeyShot is CPU driven and uses “real time” viewing each of these render were produced in 10-12minutes (1920 x 1080 – 400dpi)
Next up I’m going to run some Animations. I’ve never animated before so I’m quite looking forward to it.
Here’s a preview (to the next Post – KeyShot Animation) and my first animation!
A few days after I downloaded KeyShot 3.1 I received an email seeing if I required assistance (“Unlink Material” advice came a rapid response) It also came with the offer of “would I like to try an unrestricted trial (no watermarks on renders) including animation. A generous offer which I gratefully took up. The KeyShot customer service is as good as their product.

Leave a comment