
Thought I should do a follow up after posting the Bugatti Veyron images. Wasn’t 100% happy with some of the images so it gave me an excuse to have another play using Fog with Lights
I decided that I should have another crack at recreating (& hopefully improve on) this image. I’ve recorded some of the steps along the way.

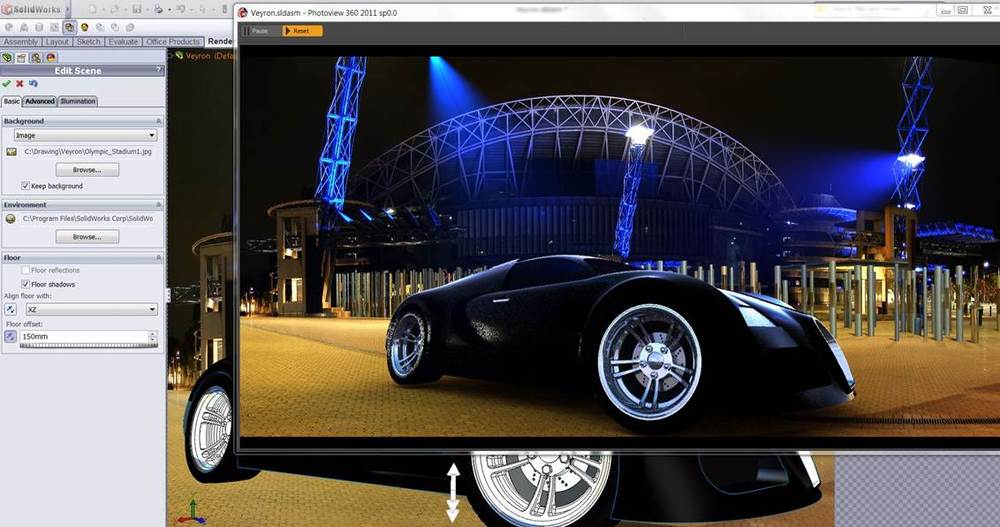
I start by dropping in Reflective Floor Black

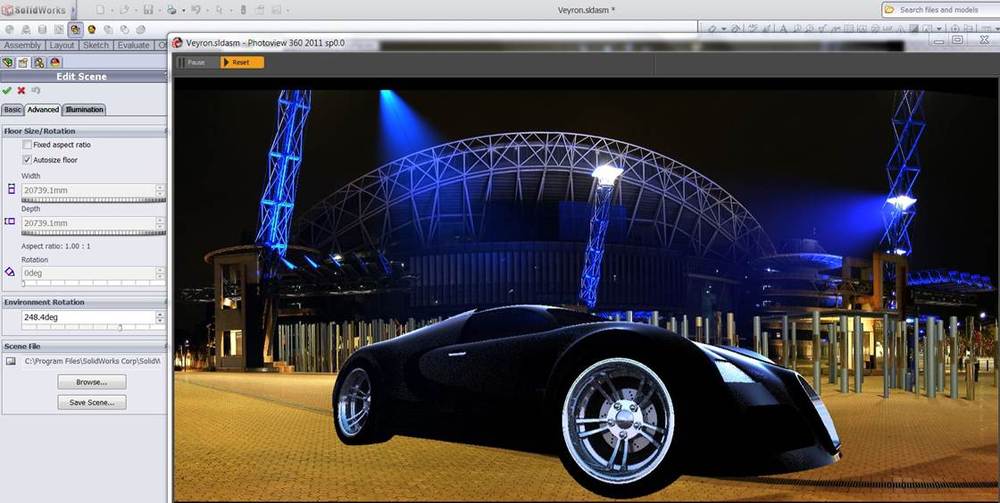
Edit the Scene and Select – Image. In this case one of my favourite images of the Olympic Stadium (Sydney).
This image suits the render I’m trying to create. It allows me to set a Wide Camera Angle & has captured perfectly the wonderful Blue lighting.
I Select Camera, tick Perspective and set the camera to 24mm Wide Angle. Position the vehicle in the image to give the right aspect to the image.
The wide angle also gives me the “big wheel” look and is close to what I think the photographic was taken with. (maybe 18mm)

The image has a great wide aspect so I set the Output Image Setting ( in Render Options) to “Use Background Aspect Ratio” It then automatic uses the Image size (in this case 2048 x 1024)

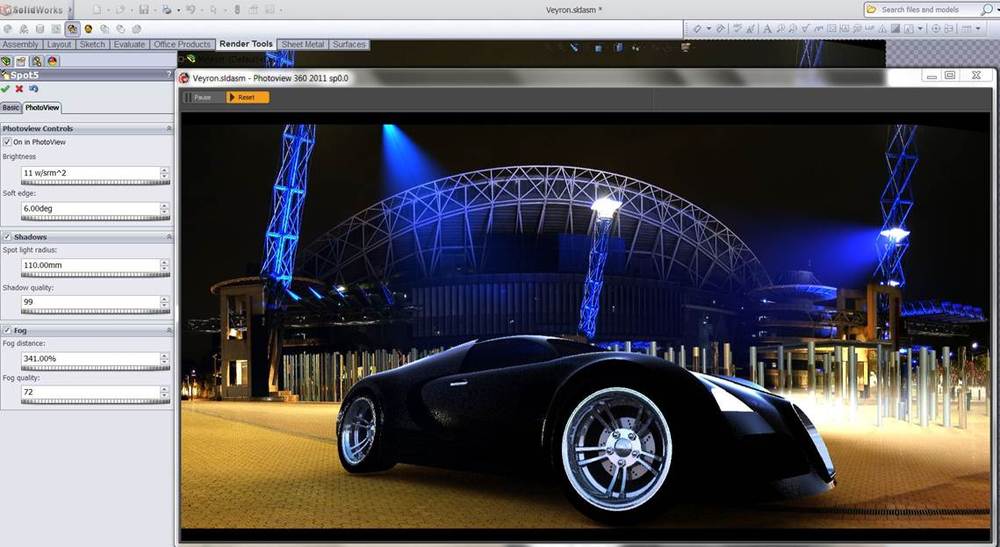
I then add a Spot Light. I drag the light source to the “light” on the tower. Change some of the setting in Photoview Tab. Select (Tick) Fog – then adjust Fog Distance & Fog Quality
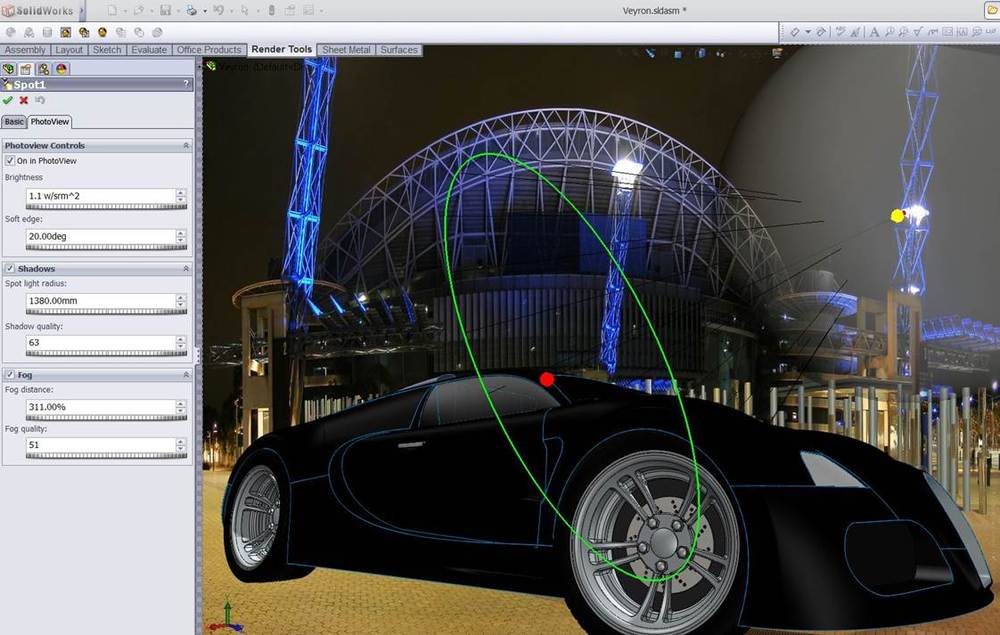
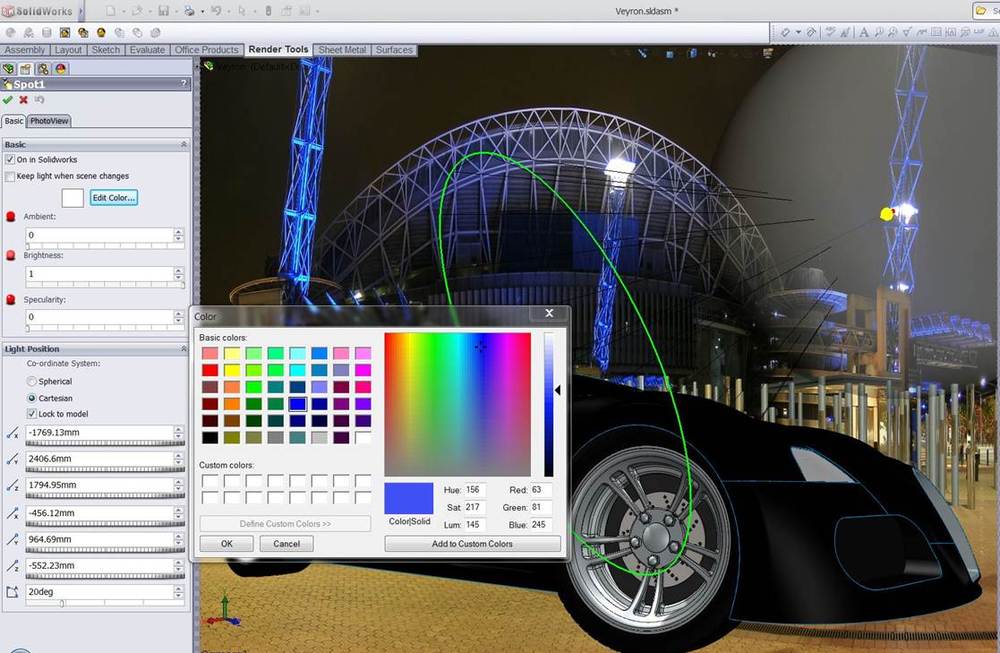
I change the colour from white to blue & adjust the colour to suit/ match the light towers.
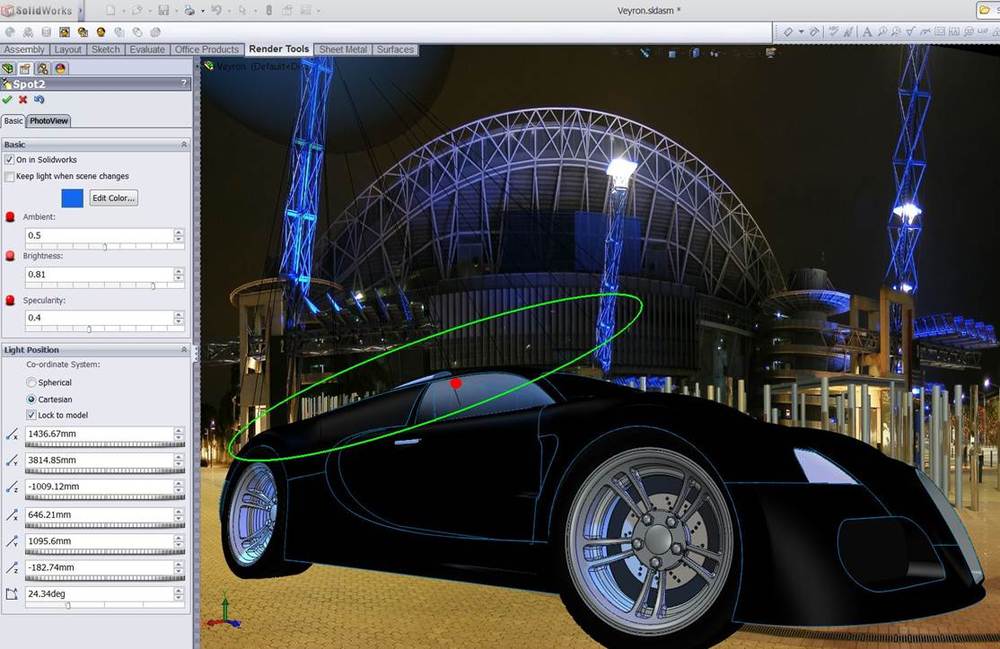
I add another Spot Light & repeat the above steps to suit.
Do a quick preview to see how the lights look, adjust to suit (the image in my head)
I also adjust the Environment Rotation to swing the “light direction” toward the front of the vehicle
The wheels are too “blue” so I had a couple of Spot Lights & point at the wheels. I change the colour to a cream/ pale I don’t want them too white.

Check the position of all the Spot Lights

Turn (Tick) on Shadow & adjust the Floor Offset. This is one of the areas I have been going wrong. I keep forgetting to switch directions of the floor offset so the shadow comes right up past the wheel. Which is one of the reasons the back wheel appears to be off the ground. Even this preview shows that the shadow needs to come up higher. (The setting eventually ended up at 170mm)
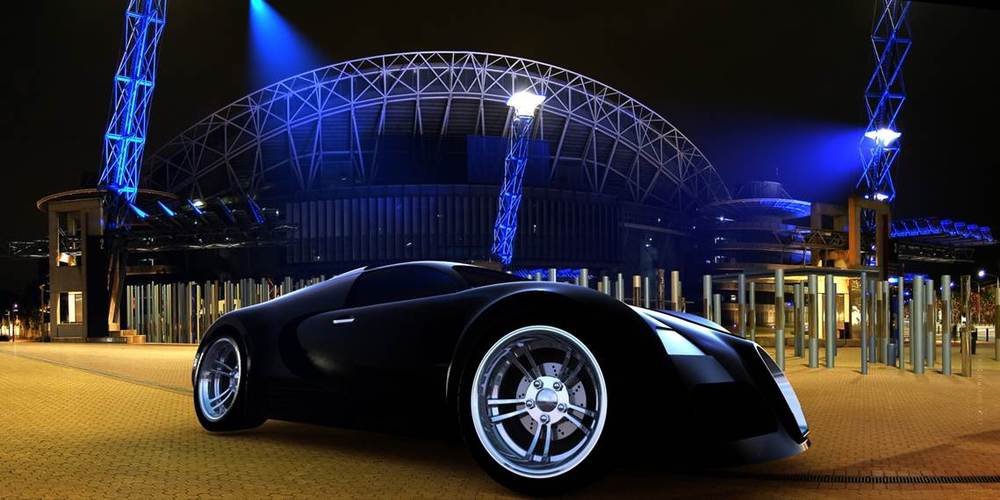
Preview & I’m ready to run “Final Render”

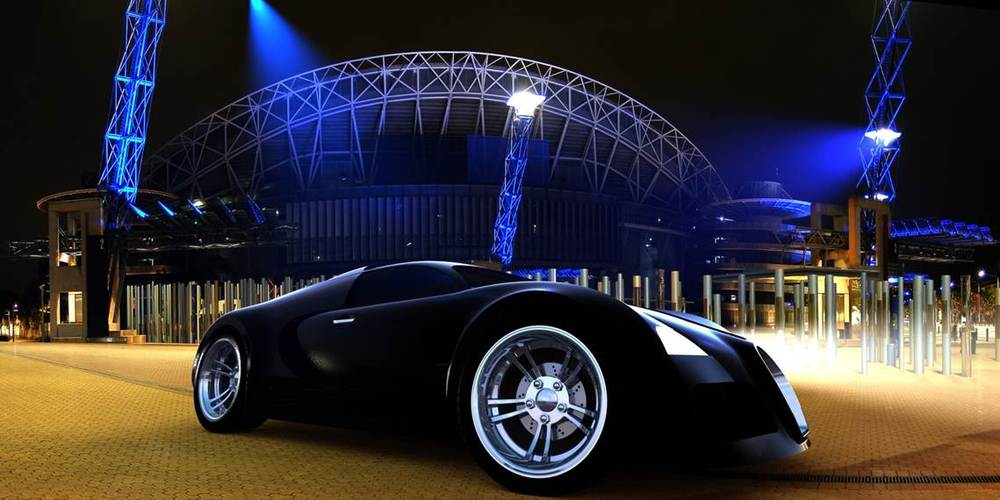
Nice Image but I have another couple of things to try.
Change headlights “Appearance/ Colour to “White LED”
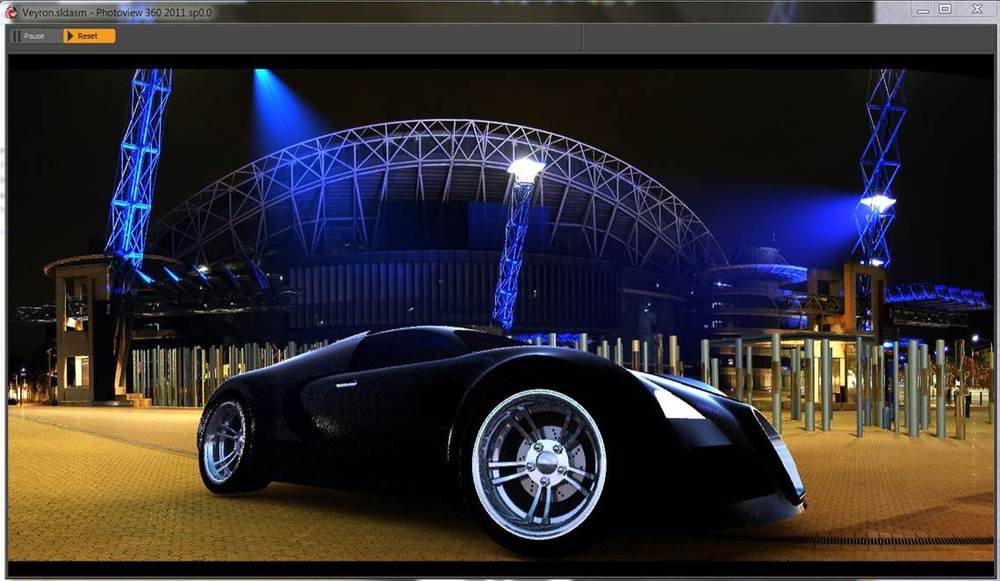
Add Spot Light from (going away from) Head Light
Select (Tick) Fog and adjust Brightness, soft edge, Fog Distance & Quality to suit
Final Results – Looks alright. So that me – Rendering the Veyron my way! What I did with Lights & Fog

Leave a comment